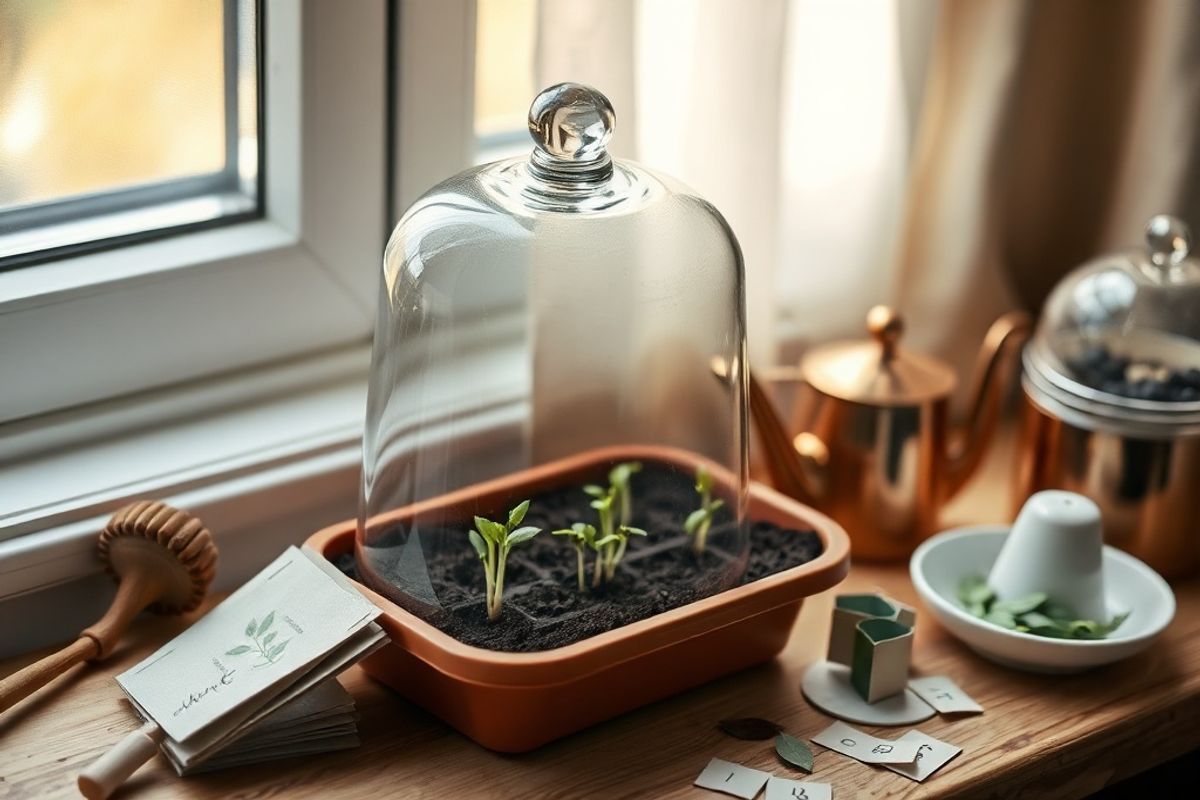
Starting seeds indoors is a rewarding way to get a head start on your gardening season, but without the right conditions, seedlings can struggle to thrive. A mini greenhouse creates the perfect environment—warm, humid, and protected—helping your seedlings grow strong and healthy before transplanting. Whether you're a beginner or an experienced gardener, building a simple propagation greenhouse is easier (and more affordable) than you might think.
In this guide, we’ll walk you through creating a compact, effective mini greenhouse using everyday materials. No fancy tools or expensive setups are required. By the end, you’ll have a controlled microclimate that boosts germination rates and supports robust seedling development.
Materials Needed
- Clear plastic storage bin with lid (at least 6–12 inches tall, 10+ liters capacity) – acts as the greenhouse enclosure
- Seed trays or small pots – for holding soil and seeds (ensure drainage)
- Seed starting soil mix – lightweight, sterile, and well-draining
- Labels and waterproof marker – to identify seeds and planting dates
- Spray bottle or small watering can – for gentle watering without disturbing seeds
- Clear plastic wrap or humidity dome (optional) – for extra moisture retention
- Small fan (optional) – for air circulation to prevent mold
- Heat mat (optional) – to maintain consistent warmth for faster germination
- Scissors or box cutter – for ventilation modifications
- Tape or rubber bands – to secure vents (if needed)
Preparation Steps
Step 1: Choose Your Seeds and Timing
Select seeds that are suitable for indoor propagation. Fast-growing vegetables like lettuce, radishes, and herbs, or slow-growing flowers such as marigolds and zinnias, all work well. Avoid large or slow-to-germinate seeds unless you’re using a heat mat.
Check your last expected frost date and count backward using the seed packet’s “days to germination” and “days to transplant.” Most seedlings need 6–8 weeks indoors before moving outside. Start seeds accordingly to avoid leggy or overgrown plants.
Step 2: Prepare Your Growing Containers
Clean and sanitize your seed trays or small pots with a mild bleach solution (1 part bleach to 9 parts water) to prevent damping-off disease—a common fungal issue in seedlings. Rinse well and allow to dry.
Fill each container with moistened seed starting mix, leaving about ½ inch of space from the top. Gently firm the soil but avoid compacting it. Lightly water before planting to ensure even moisture.
Assembly
Step 3: Build the Mini Greenhouse Structure
Take your clear plastic storage bin and remove the lid. If your bin has no drainage, use a box cutter to carefully poke small holes in the bottom of the bin for excess water to escape. This is essential to prevent waterlogging and root rot.
Place your seed trays or pots inside the bin. Arrange them so they’re level and evenly spaced. If using individual pots, group them together to conserve space and maintain humidity.
Label each container with the seed type and planting date using waterproof labels. This helps track germination times and care routines.
Step 4: Create a Humid, Controlled Environment
After planting your seeds according to packet instructions (typically ¼ inch deep), cover the bin with its clear lid. The lid acts as a humidity dome, trapping moisture and warmth.
For added humidity, you can place a small tray of water inside the bin (away from direct contact with pots) or use clear plastic wrap over the top instead of the lid. This is especially helpful in dry indoor environments.
If you’re using a heat mat, place it underneath the bin to provide bottom heat, which can speed up germination by 30–50%. This is ideal for heat-loving plants like tomatoes and peppers.
Optional: Cut small ventilation holes (about 1 inch in diameter) on opposite sides of the lid using a box cutter. Cover these with fine mesh or tape over half the hole if you want to control airflow. Ventilation prevents mold and strengthens seedlings by simulating outdoor conditions.
Mistakes to Avoid
❌ Overwatering: Too much water can drown seeds or lead to fungal growth. Keep soil moist but not soggy. Bottom watering (adding water to the tray and letting the soil absorb it) helps prevent overwatering.
❌ Poor drainage: Without drainage holes, water pools at the bottom, suffocating roots and promoting disease. Always ensure your containers have proper drainage.
❌ Inconsistent warmth: Seeds need consistent temperatures to germinate. Avoid placing the bin near drafty windows or heaters. A heat mat can help maintain optimal soil temperature (70–85°F for most seeds).
❌ Skipping labels: Without labels, it’s easy to forget what you planted or when. Use waterproof labels and include the variety and planting date.
❌ Forgetting to ventilate: After germination, seedlings need fresh air. Without ventilation, humidity builds up, leading to mold and weak, leggy plants. Gradually introduce air by opening vents or lifting the lid for short periods each day.
Pro Tips
🌱 Use grow lights: Natural light from a south-facing window may not be enough. Supplement with a LED grow light placed 2–4 inches above the seedlings for 14–16 hours daily. This prevents leggy, weak seedlings.
🌱 Rotate daily: Seedlings grow toward light. Rotate your mini greenhouse 180 degrees each day to ensure even growth and prevent leaning.
🌱 Thin seedlings early: Once seedlings have their first true leaves (not the initial seed leaves), thin them so the strongest ones remain. Use small scissors to snip weaker seedlings at soil level—don’t pull, as this can disturb roots.
🌱 Monitor humidity: Aim for 70–80% humidity inside the greenhouse. A simple digital hygrometer can help track levels. Use a spray bottle to mist lightly if humidity drops.
🌱 Hardening off before transplanting: A week before moving seedlings outdoors, gradually reduce humidity and temperature. Remove the lid for a few hours each day, then increase exposure over time. This reduces transplant shock.
🌱 Reuse responsibly: After use, clean your bin and lid with soapy water and a bleach solution to prevent disease carryover. Store your mini greenhouse in a cool, dry place until next season.
With your seedling propagation mini greenhouse set up, you’re now ready to nurture the next generation of plants. Watching seeds sprout and grow into healthy seedlings is incredibly satisfying—and with this simple setup, you’re giving them the best possible start.
Remember: patience and observation are key. Each plant species has unique needs, so adjust care as you go. Happy gardening!