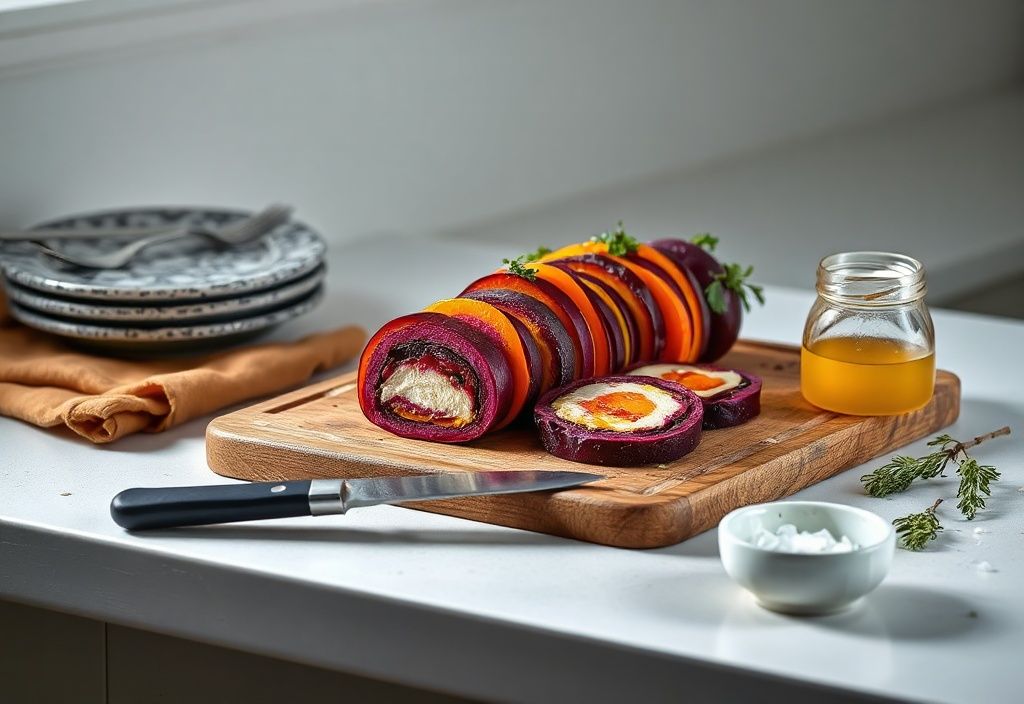
Welcome to HomeReadyHub! Today, we’re diving into a delightful and visually striking dish: the colorful vegetable terrine. This elegant yet simple recipe is perfect for impressing guests, adding a vibrant touch to your table, or enjoying a healthy, nutrient-packed meal. Whether you're a seasoned cook or a beginner, this guide will walk you through every step to create a terrine that’s as beautiful as it is tasty.
A vegetable terrine is essentially a layered dish of vegetables, often bound together with a savory custard or gelatin. It’s a fantastic way to celebrate seasonal produce, experiment with textures, and play with colors. Plus, it’s entirely customizable—swap in your favorite veggies, herbs, and seasonings to make it your own. Let’s get started!
Materials needed
Before we begin, gather these essential tools and ingredients. Having everything ready will make the process smooth and enjoyable.
- Vegetables (pick 4-6 for vibrant layers):
- Beets (for deep red/purple)
- Carrots (for bright orange)
- Eggplant (for deep purple)
- Zucchini (for light green)
- Yellow squash (for golden yellow)
- Red and yellow bell peppers (for bright accents)
- Spinach or arugula (for green layers)
- For the binding custard (or gelatin base):
- 3 large eggs
- 1 cup heavy cream or coconut milk (for dairy-free)
- 1/2 cup grated Parmesan cheese (optional, omit for vegan)
- 2 cloves garlic, minced
- Salt and freshly ground black pepper to taste
- 1 tsp dried herbs (thyme, oregano, or basil work well)
- Equipment:
- Loaf pan (9x5 inches) or a terrine mold
- Parchment paper
- Mandoline slicer (for even, thin slices)
- Mixing bowls
- Whisk
- Blender or food processor (optional, for custard)
- Plastic wrap
- Extras (optional):
- Fresh herbs for garnish (parsley, chives, dill)
- Olive oil or balsamic glaze for drizzling
- Toasted bread or crackers for serving
Preparation steps
Prep is key to a beautiful terrine. Take your time to slice and prep each vegetable carefully. This ensures even cooking and stunning layers.
Step 1: Preheat and prep the pan
Preheat your oven to 350°F (175°C). Line your loaf pan or terrine mold with parchment paper, leaving an overhang on the sides. This makes it easier to lift the terrine out later. Lightly grease the paper with olive oil or butter to prevent sticking.
Step 2: Slice the vegetables
The secret to a vibrant terrine lies in thin, even slices. Use a mandoline slicer for consistency—aim for slices about 1/8 inch (3 mm) thick. If you don’t have one, a very sharp knife will work, though it may take more time and care.
For best results, lightly blanch harder vegetables like carrots, beetroot, and eggplant in boiling water for 1-2 minutes to soften them slightly. Pat them dry with a clean towel before arranging. Softer vegetables like zucchini and squash can be used raw or lightly sautéed to reduce moisture.
Tear leafy greens (like spinach or arugula) into large pieces. If using bell peppers, roast them first to enhance their sweetness and make them easier to slice thinly.
Pro tip: To keep colors vivid, slice vegetables just before assembling the terrine. Some veggies, like beets, can bleed and discolor others if left too long.
Assembly
Now comes the fun part—building your terrine layer by layer! Think of it like a colorful mosaic. Start with the lightest colors and work your way to the darker ones, or vice versa. The order depends on your desired visual effect.
Step 3: Prepare the vegetable layers
Choose 4–6 vegetables for a balanced mix of color and flavor. For a classic rainbow terrine, try this order (from bottom to top):
- Yellow layer: Yellow squash or roasted bell pepper
- Orange layer: Carrots
- Green layer: Zucchini or spinach
- Red layer: Beets
- Purple layer (optional): Eggplant
Arrange your sliced vegetables in overlapping rows, slightly fanning them out to create a consistent layer. Press them gently into the pan to ensure they hold together. Repeat with each color, slightly overlapping edges for a seamless look.
Leave about 1/2 inch (1 cm) of space at the top for the custard or gelatin to bind everything together.
Step 4: Prepare and pour the binding mixture
In a blender or bowl, whisk together the eggs, cream (or coconut milk), minced garlic, Parmesan (if using), salt, pepper, and herbs until smooth. This custard will hold the terrine together as it bakes.
Gently pour the mixture over the layered vegetables, ensuring it seeps into all the gaps. Use a spatula to spread it evenly. The custard should just cover the top layer—don’t overfill the pan.
Cover the terrine with plastic wrap and press gently to remove air bubbles. This helps the layers set evenly.
Baking and setting
Place the terrine pan in a larger baking dish and add hot water to the outer pan to create a water bath. This gentle heat prevents the terrine from drying out and ensures even cooking.
Bake for 50–60 minutes, or until the custard is set and the top is golden. A toothpick inserted into the center should come out clean.
Once done, remove from the oven and let it cool in the pan for 15 minutes. Then, carefully transfer it to a wire rack or plate. Cover with plastic wrap and refrigerate for at least 4 hours, preferably overnight. This resting time allows the terrine to firm up and the flavors to meld.
Mistakes to avoid
Even the best cooks can run into issues. Here are common pitfalls and how to avoid them:
- Soggy terrine: If your layers are too wet, pat vegetables dry after blanching and avoid overcrowding. Use a paper towel to absorb excess moisture before arranging.
- Mushy texture: Overcooking or using too much custard can make the terrine too soft. Stick to the baking time and use just enough binding mixture to hold the layers.
- Dull colors: Some vegetables bleed or discolor when cooked. To preserve vibrancy, slice veggies just before assembly and use acidic ingredients like lemon juice to brighten colors.
- Uneven layers: Press vegetable slices firmly and evenly. Avoid gaps, as they can cause the terrine to collapse during slicing.
- Difficulty unmolding: If the terrine sticks, run a knife around the edges and dip the pan in warm water for a few seconds before lifting.
Pro tips
Take your terrine from good to extraordinary with these expert suggestions:
- Layer flavors: Add depth by seasoning each vegetable layer individually. Sprinkle salt, pepper, or herbs between layers.
- Use gelatin for a firmer set (optional): Replace the custard with 2 packets of unflavored gelatin dissolved in warm water. Pour it over the layers and chill overnight. This creates a firmer terrine that slices cleanly.
- Try a vegan version: Use silken tofu blended with nutritional yeast, lemon juice, and spices instead of eggs and cream. Press layers tightly and chill for 8+ hours.
- Garnish creatively: Top with fresh herbs, edible flowers, or a drizzle of pesto or olive oil before serving for extra flair.
- Portion control: Use mini loaf pans or ramekins for individual terrines—perfect for dinner parties or gifts.
- Storage: Keep refrigerated for up to 4 days. Serve chilled or at room temperature with crusty bread or a light salad.
- Make ahead: Terrines taste even better the next day as flavors develop. Prep it a day in advance for best results.
Serving suggestions:
- Slice into thick pieces and serve on a platter with a dollop of herbed cream cheese or hummus.
- Pair with a crisp white wine or sparkling water with lemon.
- Add a side of mixed greens dressed with balsamic vinaigrette for a light lunch.
Now that you’ve mastered the colorful vegetable terrine, the possibilities are endless. Mix and match your favorite seasonal produce, experiment with herbs and spices, and let your creativity shine. This dish is not only a feast for the eyes but a nourishing centerpiece for any table.
Happy cooking from HomeReadyHub! Tag us on social media with your creations—we’d love to see your vibrant terrines in action. Until next time, keep exploring the joy of homemade meals.
