There’s something magical about biting into a perfectly crispy, yet tender thin-crust pizza—hot from the oven, with just the right amount of chew. The secret? A homemade pizza dough that’s been lovingly prepared, rolled out thin, and baked to golden perfection. Whether you're craving a classic Margherita, a loaded pepperoni pie, or a gourmet white pizza, starting with a great base is key.
Materials needed
Before you begin, gather your ingredients and tools. Using the right equipment will help you achieve a smooth, elastic dough that rolls out thin without shrinking back.
- All-purpose flour or bread flour – 500g (4 cups). Bread flour gives a slightly chewier texture, while all-purpose is lighter. For extra crispiness, use 00 flour if available.
- Lukewarm water – 300ml (1 ¼ cups), about 35–38°C (95–100°F). Should feel warm to the touch, not hot.
- Active dry yeast – 7g (2 ¼ tsp or 1 standard packet). Ensure it’s fresh for best rise.
- Olive oil – 2 tablespoons, plus extra for greasing.
- Salt – 10g (2 tsp), fine sea salt preferred.
- Sugar – 1 tsp, helps activate the yeast.
- Large mixing bowl – preferably glass or stainless steel.
- Kitchen scale – for accurate measurements (highly recommended).
- Stand mixer with dough hook (optional) – speeds up kneading.
- Plastic wrap or damp tea towel – to cover the dough during rest.
- Rolling pin – a French-style tapered pin works best for even thickness.
- Baking tray or pizza stone/steel – preheated in the oven for best results.
- Parchment paper – optional, for easy transfer.
Preparation steps
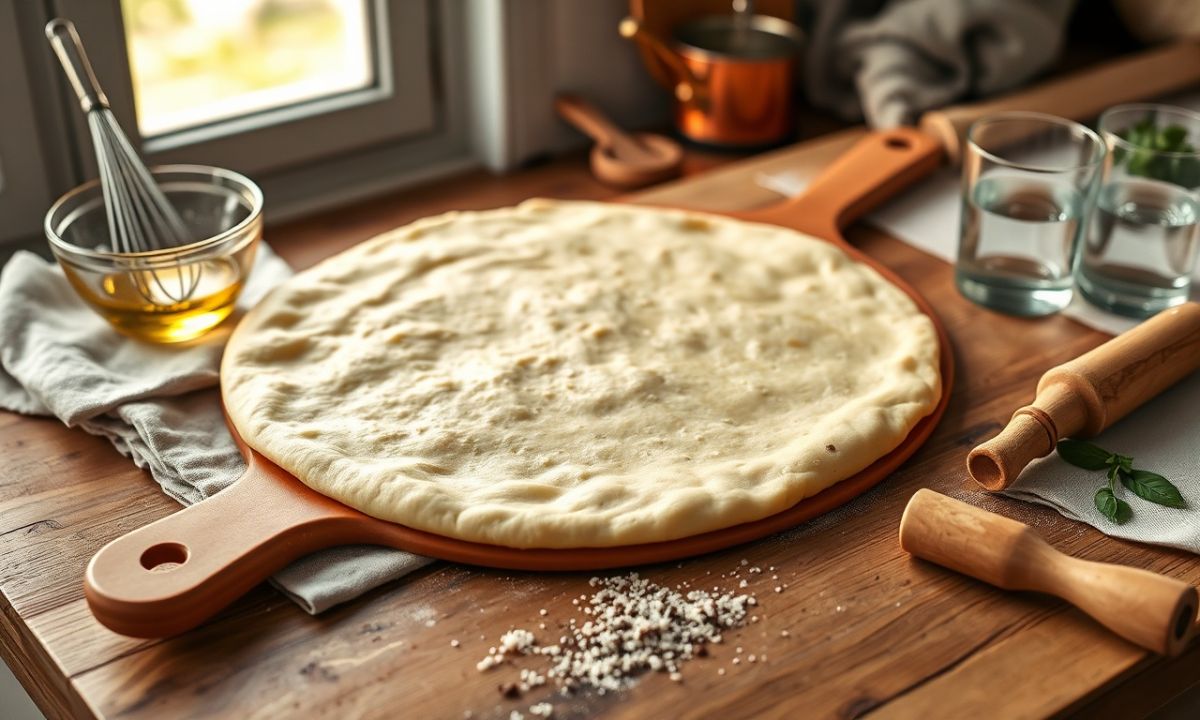
Making thin pizza dough at home is simpler than you think. Follow these steps carefully, and you’ll have a supple, stretchy dough ready for your toppings in under 2 hours (including resting time).
Step 1: Activate the yeast
In a small bowl, combine the lukewarm water, sugar, and yeast. Stir gently and let sit for 5–10 minutes. You should see the mixture become frothy and bubbly—this means your yeast is alive and ready to work. If it doesn’t bubble, your yeast may be old; start again with fresh yeast.
Step 2: Mix the dough
In a large bowl (or the bowl of a stand mixer), whisk together the flour and salt. Make a well in the center and pour in the activated yeast mixture and olive oil. Using a wooden spoon or dough hook, mix until a shaggy dough forms—about 2–3 minutes.
If using a stand mixer, knead on low speed with the dough hook for 5–7 minutes until smooth and elastic. The dough should pull away from the sides of the bowl and feel slightly tacky but not sticky.
Alternatively, knead by hand on a lightly floured surface for 8–10 minutes, until smooth and supple.
Assembly
After kneading, the dough needs time to rest and develop flavor and elasticity. This step is crucial for achieving a thin, stretchy crust that holds its shape.
Step 3: First rise (bulk fermentation)
Lightly oil a clean bowl and place the dough inside, turning to coat. Cover with plastic wrap or a damp tea towel. Let rise in a warm, draft-free spot for 1 to 1.5 hours, or until doubled in size.
Tip: For best results, place the bowl in a turned-off oven with the light on—this creates a warm environment ideal for rising.
Step 4: Divide and rest (optional for multiple pizzas)
Once risen, punch down the dough to release air. Divide into 2 or 3 equal portions (depending on desired pizza size). Shape each into a round ball, cover, and let rest for another 30 minutes. This relaxes the gluten, making the dough easier to roll out thin without springing back.
Mistakes to avoid
Even small errors can affect your dough’s texture and rise. Here’s what to watch out for:
- Using cold water or hot water – Water that’s too cold slows yeast activity; water that’s too hot kills it. Aim for lukewarm (about body temperature).
- Skipping the rest time – Rushing the rise leads to dense, tough crusts. Let the dough ferment fully for depth of flavor.
- Over-kneading – Too much kneading makes dough tough. Stop when it’s smooth and elastic.
- Rolling too thin too soon – Without proper resting, the dough will resist stretching and shrink back.
- Using too much flour when rolling – Excess flour dries the dough and can make it brittle. Use just enough to prevent sticking.
Pro tips
Want to take your thin-crust pizza to the next level? Try these expert tricks:
- Use a pizza stone or steel – Preheat in the oven at 260°C (500°F) for at least 30 minutes. This mimics a pizzeria’s deck oven and ensures a crispy bottom.
- Pre-bake the crust (par-bake) – For extra crispiness, roll out the dough, dock it with a fork, and bake for 5–7 minutes before adding toppings. This prevents a soggy crust.
- Roll from the center outward – Use even pressure and rotate the dough as you go to maintain a uniform thickness.
- Stretch by hand for authenticity – After rolling, gently stretch the dough with your fingertips over your knuckles for an airy, rustic thin crust.
- Add a touch of semolina or cornmeal – Dust your pizza peel or tray with it for better grip and a subtle crunch on the bottom.
- Use a pizza peel – For easy transfer to the oven, especially when using a stone or steel.
You can also experiment with flavor infusions. Add 1 tsp of dried oregano to the flour for a classic Italian taste, or mix in 1 tbsp of grated Parmesan for a savory note. For a whole-wheat version, replace up to 30% of the flour with whole wheat—just increase hydration slightly as whole wheat absorbs more water.
Conclusion
Making thin pizza dough at home isn’t just about convenience—it’s about control. You choose the ingredients, the thickness, and the bake. With a little patience and practice, you’ll master a crisp, golden crust that’s far better than store-bought.
Remember: great pizza starts with great dough. Let it rise, rest, and relax. Treat it gently when shaping. And most importantly—have fun experimenting with toppings and baking methods.
Now, preheat your oven, roll out that dough, and get ready to enjoy the best homemade thin-crust pizza you’ve ever tasted. Buon appetito!