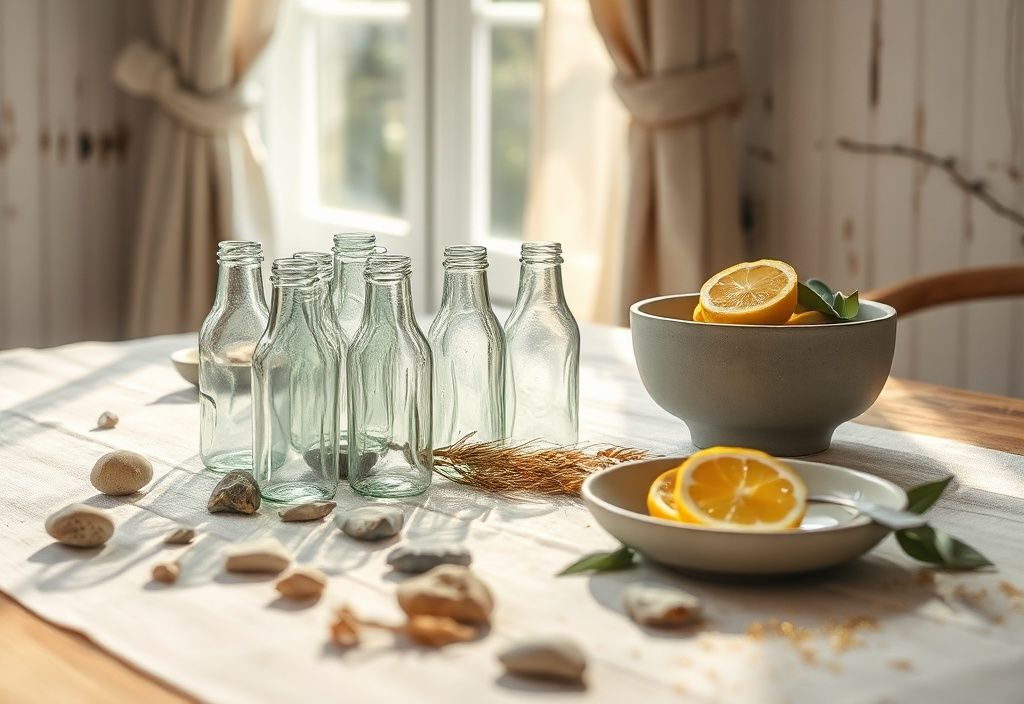
Hello creative souls and eco-conscious decorators! Sara here from HomeReadyHub, and today we’re diving into a project that’s not only incredibly satisfying but also a fantastic way to give new life to something often discarded: plastic bottles. In a world increasingly aware of its environmental footprint, upcycling isn't just a trend; it's a mindful choice that benefits both our planet and our wallets. And what better way to contribute than by turning everyday waste into beautiful, functional home decor?
Plastic bottles, ubiquitous in our daily lives, often end up in landfills, taking hundreds of years to decompose. But with a little imagination and a few simple tools, they can be transformed into elegant, personalized vases that add a unique touch to any room. Imagine a collection of bespoke vases, each reflecting your style, holding your favorite fresh or dried flowers, all crafted from items you might otherwise have thrown away. This tutorial will guide you through every step, from selecting the perfect bottle to adding those final decorative flourishes. Get ready to unleash your inner artist and make a tangible difference, one beautiful vase at a time!
Materials needed
- Assorted Plastic Bottles: Look for various shapes, sizes, and colors. Water bottles, soda bottles, milk jugs (smaller ones), or even shampoo bottles can work. The clearer the plastic, the more versatile it might be for certain decorative techniques.
- Cutting Tools:
- Sharp Utility Knife or Box Cutter (for initial scoring – adult supervision recommended if children are involved).
- Heavy-Duty Scissors (craft scissors or kitchen shears work well for a clean cut).
- Safety Gear:
- Cutting Mat or a sturdy surface protector.
- Work Gloves (to protect hands from sharp edges).
- Measuring and Marking Tools:
- Ruler or measuring tape.
- Permanent Marker or China Marker.
- Smoothing Tools (Optional but Recommended):
- Fine-grit Sandpaper (120-220 grit) or an Emory board.
- Heat Gun or Hair Dryer (for shaping edges – use with extreme caution and adult supervision).
- Adhesives:
- Hot Glue Gun and Glue Sticks.
- Strong Craft Glue (e.g., E6000, super glue) for non-porous decorations.
- Mod Podge (for decoupage or sealing).
- Decorative Elements (Choose based on your desired look):
- Paints: Acrylic paints, spray paint (with primer for plastic), chalk paint.
- Brushes: Various sizes for painting.
- Textural elements: Twine, yarn, fabric scraps, ribbon, lace.
- Embellishments: Beads, sequins, glitter, small pebbles, buttons, dried flowers, small twigs, leaves.
- Sealant: Clear spray sealant (matte or glossy) to protect painted surfaces.
- Optional: Stencils, masking tape (for clean lines).
Preparation steps
Step 1: Clean and Prep Your Bottles
This initial step is crucial for ensuring your vase project is successful and long-lasting. Start by collecting your chosen plastic bottles. The variety in shapes and sizes will lend character to your final collection, so don't be afraid to mix and match. Once you have your selection, it's time for a thorough cleaning.
Remove Labels: Peel off all labels. For stubborn adhesive residue, try soaking the bottle in warm, soapy water. A little rubbing alcohol, Goo Gone, or even cooking oil on a paper towel can also work wonders to remove sticky remnants. Ensure no sticky patches remain, as these will interfere with paint adhesion or the smooth application of decorative elements.
Wash Thoroughly: Wash the inside and outside of each bottle with warm water and dish soap. Use a bottle brush if necessary to reach all corners and remove any lingering odors or residues from their original contents. This is especially important if you're repurposing food or beverage containers.
Dry Completely: This step cannot be stressed enough. Any moisture left on the bottle will prevent paint from adhering properly and can cause bubbles or peeling. Allow the bottles to air dry completely, preferably overnight. You can also place them upside down on a drying rack or use a clean cloth to wipe them dry, ensuring no condensation remains inside.
Step 2: Mark and Cut Your Bottles
Now for the exciting part – defining the shape of your vase! This is where your creativity truly begins to take form. Consider the type of flowers you envision in your vase – tall stems will require a taller cut, while shorter, fuller arrangements might suit a more compact vase.
Determine Desired Height: Using your ruler and permanent marker, mark the line where you want to cut your bottle. Think about the overall aesthetic. Do you want a straight, clean cut? A wavy top edge for a playful look? Or perhaps an angled cut for a modern, architectural feel? You can even draw freehand designs if you're feeling adventurous.
Safety First: Always place your bottle on a sturdy cutting mat or a protected surface. Don a pair of work gloves to prevent accidental cuts. Plastic can be slippery, and a steady hand is essential.
Initial Score with Utility Knife: For a cleaner, straighter cut, especially on thicker plastic, it's often best to start with a utility knife. Carefully score the plastic along your marked line. Do not try to cut all the way through in one go. A shallow score provides a guide for your scissors and helps prevent jagged edges.
Cut with Scissors: Once you have a score line, use your heavy-duty scissors to cut along it. For straight lines, apply steady pressure. For wavy or intricate cuts, use the tips of your scissors and take your time. If the plastic is particularly thick, you might need to make several small snips rather than one continuous cut. The goal is to achieve the smoothest edge possible at this stage.
Assembly
Step 3: Smooth and Shape Edges (Optional but Recommended)
While optional, smoothing and shaping the edges of your newly cut bottle will elevate your upcycled vase from a craft project to a polished piece of decor. It also makes the vase safer to handle.
Sanding: Even with careful cutting, the edges of plastic bottles can be sharp or uneven. Take a piece of fine-grit sandpaper (120-220 grit works well) or an Emory board and gently sand the cut edge. Move the sandpaper in a circular motion or along the edge until it feels smooth to the touch. This step not only removes sharp points but also provides a slightly textured surface, which can help paint adhere better if you plan to paint the inside lip.
Heat Shaping (Use Extreme Caution): For a truly professional finish, you can gently roll or melt the edge of the plastic using a heat gun or even carefully over a low candle flame (held at a safe distance). This technique softens the plastic, allowing you to gently roll the edge inwards to create a smooth, rounded lip, similar to a traditional glass vase. This also adds structural integrity to the rim. If using a heat gun, keep it moving constantly and work in short bursts to avoid melting the plastic too much or creating an uneven finish. If using a flame, hold the bottle about an inch above the flame, rotating it slowly and evenly. Never let the plastic touch the flame directly, as it can burn and release fumes. Always do this in a well-ventilated area and have a fire extinguisher or a bowl of water nearby for safety. This step requires practice and extreme care.
Alternatively, if you plan to wrap the top edge with twine, ribbon, or fabric, you might not need to smooth the edge as meticulously, as the decoration will cover it.
Step 4: Decorate Your Vases
This is where your creativity truly shines! The possibilities for decorating your plastic bottle vases are virtually endless. Consider the overall aesthetic of your home and the types of flowers you'll display.
Painting:
- Preparation: If you're painting, a crucial first step is to apply a primer specifically designed for plastic. This ensures your paint adheres well and doesn't chip or peel later.
- Application: For spray paint, work in a well-ventilated area, applying multiple thin coats rather than one thick one to prevent drips and achieve a smooth finish. For acrylic or chalk paint, use brushes and apply even strokes. You can create solid colors, ombre effects, or even intricate designs with stencils or masking tape.
- Sealing: Once the paint is completely dry (follow manufacturer's recommendations, usually 24-48 hours), apply a clear spray sealant (matte or glossy) to protect the paint and give it a durable finish.
Wrapping:
- Materials: Twine, jute, yarn, ribbon, lace, or even strips of fabric can create beautiful textures.
- Technique: Start by applying a dot of hot glue at the base of your vase. Press the end of your chosen material into the glue. Then, carefully wrap the material tightly around the bottle, applying small dots or thin lines of hot glue every few inches or whenever you need to secure it, especially at the top and bottom. Ensure each wrap is flush against the previous one for a seamless look.
Adorning and Decoupage:
- Embellishments: Use hot glue or strong craft glue to attach beads, sequins, small pebbles, buttons, shells, or even dried flower petals. You can create patterns or scatter them randomly for a whimsical effect.
- Decoupage: For a unique look, tear or cut pieces of decorative paper, fabric scraps, or even patterned napkins. Apply a layer of Mod Podge to the bottle, press your material onto it, and then apply another layer of Mod Podge over the top to seal it. This creates a smooth, durable finish and allows for endless pattern and texture combinations.
- Natural Elements: For a rustic or bohemian vibe, glue on small twigs, dried leaves, or bark pieces.
Feel free to combine techniques! Paint a base color, then wrap twine around the middle, or decoupage with paper and add a beaded trim. Let your imagination be your guide!
Mistakes to avoid
Even the simplest DIY projects have their pitfalls. Being aware of common mistakes can save you time, frustration, and ensure a more polished final product:
- Rushing the Cleaning and Drying: This is arguably the most common mistake. Any residual grime, sticky residue, or moisture will prevent paint from adhering properly, leading to peeling, bubbling, or an uneven finish. Patience here pays dividends.
- Uneven Cutting: Trying to cut through the plastic too quickly or without a proper guide can result in jagged, wonky edges. Take your time, score first, and use sharp scissors. An uneven edge will be difficult to smooth and can detract from the vase's appearance.
- Neglecting Safety: Working with sharp utility knives and potentially hot tools like heat guns requires caution. Always use a cutting mat, wear gloves, and ensure proper ventilation, especially when spray painting or heat shaping.
- Over-Applying Paint: Whether spray paint or brush-on, applying too much paint in a single coat will lead to drips, runs, and an unappealing, thick texture. Multiple thin coats are always better, allowing each layer to dry thoroughly between applications.
- Skipping Primer for Plastic: Plastic is a notoriously difficult surface for paint to adhere to. Without a specific plastic primer, your paint is much more likely to scratch off or peel. Don't skip this crucial step for a durable finish.
- Not Testing Adhesives: Different decorative materials might require different glues. A hot glue gun is great for quick, bulky attachments, but a strong craft glue might be better for delicate items or materials that need a stronger, more permanent bond. Always test a small area or a scrap piece if unsure.
- Underestimating Drying Times: Rushing to the next decorative step before paint, primer, or glue is fully cured can lead to smudges, damage, or a compromised finish. Always refer to product instructions for recommended drying times.
- Ignoring the Interior: While the focus is often on the exterior, consider if the inside of your vase will be visible. If so, ensure it's clean and consider painting the very top rim if it’s exposed.
Pro tips
To truly elevate your upcycled plastic bottle vases and make them stand out, here are some insider tips from the HomeReadyHub:
- Experiment with Bottle Shapes: Don't limit yourself to standard water bottles. Look for unique shapes from juice bottles, milk jugs, or even certain household cleaner bottles (thoroughly cleaned, of course!). A variety of shapes and heights in a cluster creates a more dynamic display.
- Create a Themed Collection: Instead of just one vase, try making a set of 3-5 vases that share a common theme – perhaps a consistent color palette, a repeated decorative element (like specific beads or a type of twine), or a similar texture. This creates a cohesive and professional-looking display.
- Layering is Key: Don't be afraid to combine different decorating techniques. For instance, paint a base color, then wrap a section with twine, and finally glue on a few embellishments. Layering adds depth and visual interest.
- Consider the Contents: Think about what you'll put in the vase. For fresh flowers, ensure your vase is truly leak-proof (plastic generally is, but check for any cracks). If you're worried, or if the vase has a very wide opening, you can place a smaller glass or metal container inside to hold water. For dried flowers, artificial stems, or decorative branches, you have more freedom.
- Add Weight for Stability: Plastic bottles are lightweight, which can make them prone to tipping, especially with top-heavy arrangements. Before adding flowers, you can add a layer of sand, small pebbles, or even uncooked rice to the bottom of the vase to give it more stability.
- Use Templates for Precision: For intricate cuts or consistent patterns, create paper templates. Wrap the template around your bottle and trace the design with your marker before cutting. This is especially useful for wavy or zig-zag patterns.
- Involve the Kids (Safely!): This is a fantastic project to do with children. Let them choose colors, fabrics, and embellishments for the decorating stage. Handle all cutting and heat-shaping steps yourself, but empower them to express their creativity with glue sticks and brushes.
- Gift Them! Hand-crafted upcycled vases make thoughtful and unique gifts. Fill them with a small bouquet, a battery-operated fairy light string, or even homemade potpourri for an extra special touch.
- Outdoor Use: For outdoor decoration, ensure you use outdoor-grade paints and sealants that can withstand the elements. These vases can add a pop of color to your patio or garden.
And there you have it, fellow HomeReadyHub enthusiasts! A comprehensive guide to transforming humble plastic bottles into beautiful, bespoke vases that not only enhance your home decor but also contribute to a more sustainable lifestyle. It's a project that combines practicality with artistic expression, proving that 'waste' is often just a resource waiting for a second chance.
So, gather your bottles, unleash your creativity, and let's turn some trash into treasure! We'd absolutely love to see your creations. Share your finished upcycled vases on social media and tag HomeReadyHub. Happy crafting!
