Are you looking for an eco-friendly, multi-purpose cleaning solution that reduces plastic waste? A solid soap is the perfect answer! Whether you need it for laundry, dishwashing, or general cleaning, homemade solid soap is versatile, cost-effective, and free from harsh chemicals. In this tutorial, we’ll guide you through creating your own solid soap using natural ingredients that are gentle on your skin and the environment.
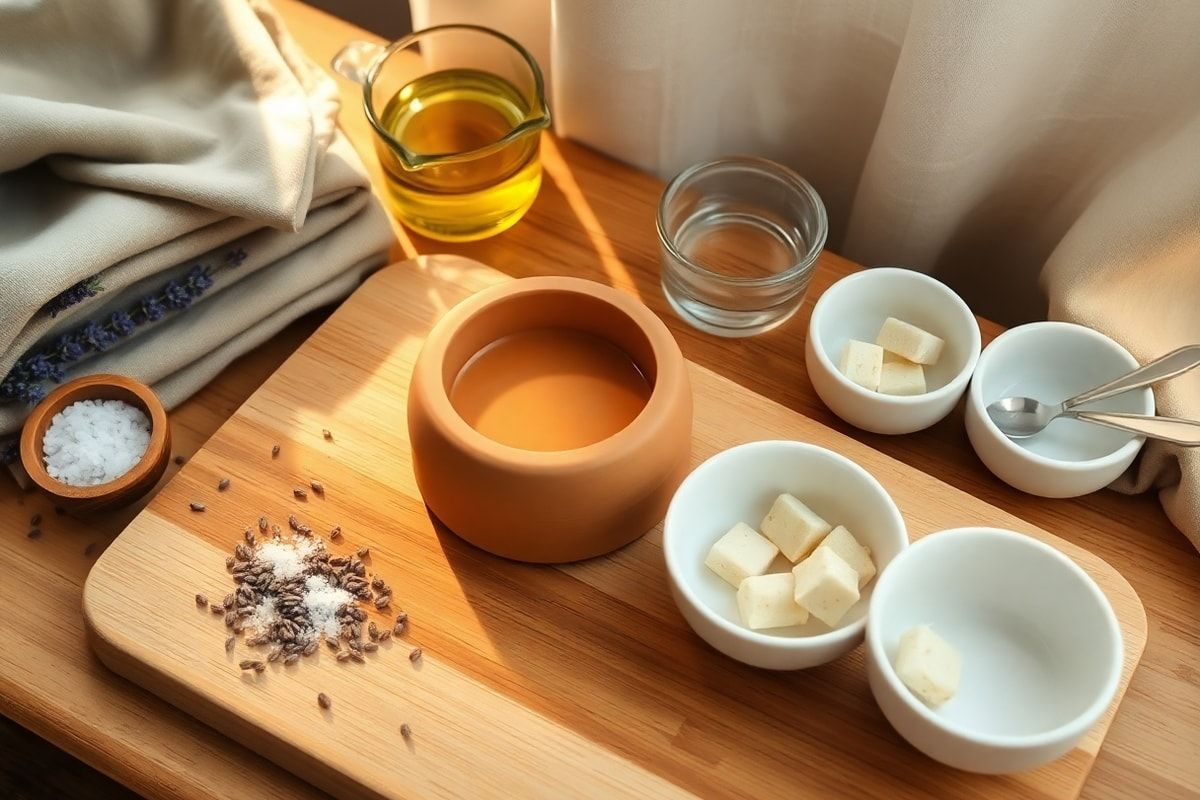
Materials Needed
- Soap base (e.g., Castile soap or glycerin soap base) – 200g
- Baking soda – 2 tablespoons (for extra cleaning power)
- White vinegar – 1 tablespoon (optional, for odor control)
- Essential oils (e.g., tea tree, lavender, or lemon) – 10-15 drops (optional, for scent and antibacterial properties)
- Water – 100ml (adjust as needed for texture)
- Silicone soap mold or ice cube tray (for shaping)
- Mixing bowl and spoon
- Grater (if using a solid soap base)
Preparation Steps
Step 1: Choose and Prepare Your Soap Base
If you’re using a solid soap base like Castile or glycerin, grate it into small, even pieces for faster melting. If you prefer a liquid soap base, skip grating and measure 200ml directly.
Step 2: Melt the Soap Base
In a mixing bowl, combine the grated soap base and water. Place the bowl over a pot of simmering water (double boiler method) to melt the soap gently. Stir occasionally until fully melted. If using a liquid soap base, heat it in the microwave in 20-second intervals, stirring between each, until liquid.
Assembly
Step 3: Add Cleaning Boosters
Once the soap base is melted, stir in the baking soda and white vinegar (if using). These ingredients enhance cleaning power and help neutralize odors. For a fragrant touch, add your choice of essential oils and mix well.
Step 4: Pour into Molds
Carefully pour the mixture into your silicone soap mold or ice cube tray. Tap the mold gently to remove air bubbles and ensure an even surface. Let the soap cool and harden at room temperature for 4-6 hours, or in the refrigerator for 1-2 hours if you’re in a hurry.
Mistakes to Avoid
- Overheating the soap base: High heat can cause the soap to separate or lose its cleaning properties. Always melt it gently.
- Adding too much water: Too much water can make the soap too soft or crumbly. Start with 100ml and adjust as needed.
- Skipping the mold prep: If you’re using a silicone mold, lightly grease it with coconut oil to make unmolding easier.
- Using too many additives: Stick to 2-3 additives (e.g., baking soda + essential oils) to avoid compromising the soap’s integrity.
Pro Tips
Here are some expert tips to elevate your solid soap:
- Customize for your needs: Add citric acid for descaling or salt for exfoliation.
- Use a double boiler to prevent burning the soap base. A slow cooker on low heat also works well.
- Test for hardness: If your soap is too soft, add a bit more grated soap base. If it’s too hard, warm it slightly and reshape.
- Store properly: Keep your solid soap in a cool, dry place to extend its shelf life. A soap dish with drainage helps prevent melting.
- Experiment with shapes: Use fun molds like hearts or stars for kid-friendly soaps or unique gifts.
The beauty of making your own solid soap is the ability to tailor it to your specific needs. Whether you’re eco-conscious, budget-savvy, or simply love DIY projects, this versatile soap is a game-changer. Plus, it makes a thoughtful gift for friends and family!
Ready to reduce waste and simplify your cleaning routine? Share your homemade solid soap creations with us on social media using #HomeReadySoap. Happy crafting!