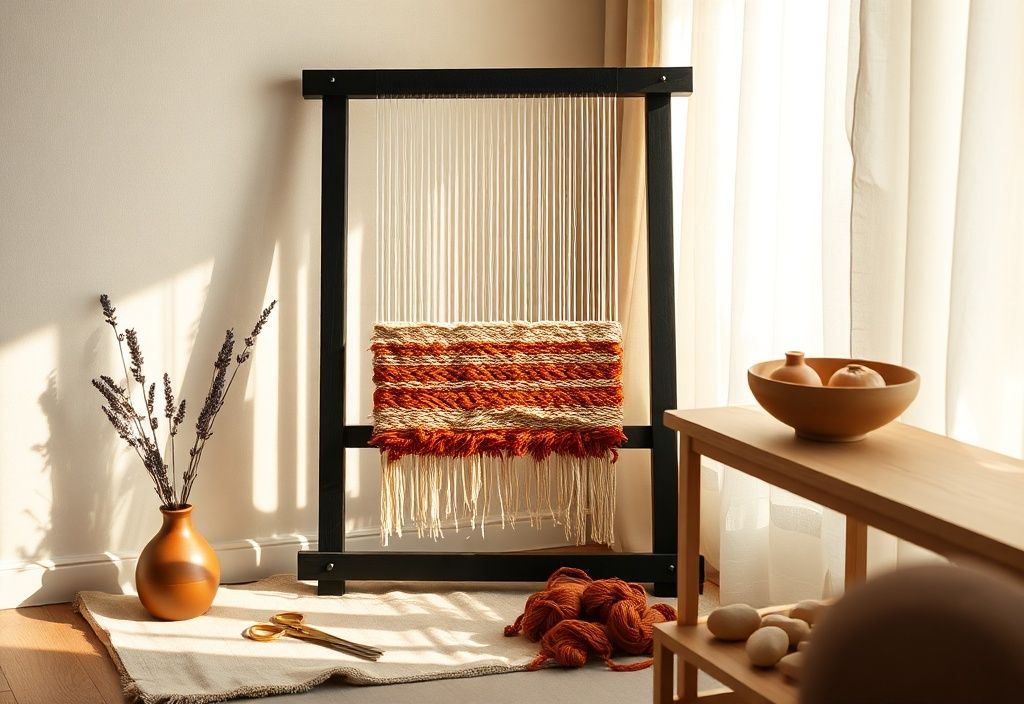
Transform your space with a handcrafted woven wall tapestry—a beautiful blend of texture, color, and artistry. Whether you're a seasoned crafter or a beginner, this DIY project is a rewarding way to add a personal touch to your home decor. Woven tapestries not only serve as eye-catching focal points but also bring warmth and character to any room. In this tutorial, we'll guide you through every step of creating your own decorative wall tapestry, from selecting materials to finishing touches.
Materials needed
- Frame or loom: A wooden frame, dowels, or a dedicated weaving loom (e.g., lap loom or rigid heddle loom). For beginners, a simple cardboard loom works too.
- Yarn or thread: Choose a variety of colors and thicknesses. For the warp (vertical threads), use strong cotton or linen yarn. For the weft (horizontal threads), wool, silk, or synthetic fibers add texture.
- Scissors: Sharp fabric scissors for clean cuts.
- Comb or beater: A weaving comb or fork to pack down the weft threads evenly.
- Tapestry needle: A large, blunt needle for weaving in ends and adding details.
- Measuring tape or ruler: To ensure even spacing.
- Optional embellishments: Beads, feathers, ribbons, or fabric strips for added texture.
- Pencil or chalk: For marking measurements on the frame.
Preparation steps
Step 1: Plan your design
Before you start weaving, sketch a simple design on paper. Consider the size of your tapestry and the colors you want to use. For beginners, abstract patterns, stripes, or geometric shapes work well. You can also follow pre-made weaving patterns or freehand your design as you go.
Tip: If you're unsure, create a small sample first to test your color combinations and techniques.
Step 2: Set up your loom or frame
If you're using a wooden frame or dowels, follow these steps:
- Measure and mark: Decide on the size of your tapestry (e.g., 12x18 inches). Mark the width on your frame or dowels using a pencil.
- Attach the warp threads: Tie a knot at one end of your warp yarn (the vertical threads) and secure it to the top of the frame. Stretch the yarn tightly across the frame and tie it off at the opposite end. Space the warp threads evenly (about 1/4 to 1/2 inch apart) using a ruler or comb.
- Secure the threads: Double-check that all warp threads are taut and evenly spaced. If any threads are loose, adjust and re-tie them.
If you're using a cardboard loom, cut slits along the top and bottom edges and thread the warp yarn through them, spacing them evenly as you go.
Assembly
Step 3: Start weaving the weft threads
Now it's time to weave the horizontal threads (weft) to create your design.
- Choose your first color: Start with the lightest or most dominant color in your design. Cut a length of weft yarn, leaving a 6-inch tail at the starting edge for securing later.
- Weave over and under: Begin at the bottom of the tapestry. Pass the weft yarn over the first warp thread, under the second, over the third, and so on. This creates the basic tabby weave (plain weave).
- Pack down the thread: Use a comb or beater to gently push the weft thread against the previous row, ensuring even tension and a tight weave.
- Change colors: When you want to switch colors, simply knot the new yarn to the old one at the edge, leaving a small tail. Weave the new color into the design, and trim the tails later.
- Repeat the pattern: Continue weaving row by row, alternating colors and techniques (e.g., stripes, blocks, or patterns) to create your design. Remember to pack down each row for a neat finish.
Step 4: Finishing touches
Once your tapestry reaches the desired length, it's time to remove it from the loom and add the final details.
- Secure the weft threads: After your last row, leave a 6-inch tail. Weave this tail back into the tapestry using a tapestry needle, hiding it among the existing threads to secure it in place.
- Remove from the loom: Carefully cut the warp threads at the top and bottom of the tapestry. Gently pull the tapestry off the loom, being careful not to tangle the threads.
Tip: If you're worried about fraying, use a small piece of tape to secure the ends temporarily before removing the tapestry.
- Trim and tidy: Use sharp scissors to trim any uneven threads or excess fringe at the top and bottom. You can leave the fringe as-is for a bohemian look or trim it evenly for a cleaner appearance.
- Add embellishments (optional): Use a tapestry needle to sew on beads, feathers, ribbons, or fabric strips to add texture and dimension. This is where you can get creative!
- Finishing the edges: To prevent fraying, you can hem the sides of your tapestry by folding the edges inward and stitching them with a needle and thread. Alternatively, leave the sides raw for a more rustic look.
Mistakes to avoid
- Uneven tension: If your weft threads are too loose or too tight, the tapestry will pucker or gap. Keep tension even by packing down each row with a comb.
- Skipping warp threads: Ensure every weft thread passes over and under the warp threads correctly to avoid gaps or snags.
- Ignoring the design: Sketch your design beforehand to avoid mistakes mid-project. If you're freehanding, work slowly and step back often to check your progress.
- Cutting corners: Rushing the finishing steps (e.g., not securing ends properly) can lead to fraying or unraveling over time.
Pro tips
- Experiment with textures: Mix different yarn weights and materials (e.g., wool for warmth, silk for shine) to create depth and interest.
- Use a shed stick: For larger tapestries, a shed stick can help separate the warp threads, making it easier to pass the weft through.
- Try advanced techniques: Once you're comfortable with plain weave, explore techniques like soumak, rya knots, or tapestry weaving for more intricate designs.
- Wash your tapestry: If the yarn is washable, gently hand-wash your tapestry to remove any dust or dirt. Lay it flat to dry.
- Hang with care: Use a dowel rod or decorative rod to hang your tapestry evenly. Avoid direct sunlight to prevent fading.
Creating a woven wall tapestry is a deeply satisfying craft that allows you to express your creativity while adding a unique piece to your home. Whether you're weaving for relaxation, decoration, or as a gift, the process is as rewarding as the finished product. Don’t be afraid to experiment with colors and techniques—each tapestry is a reflection of your personal style. Happy weaving!
