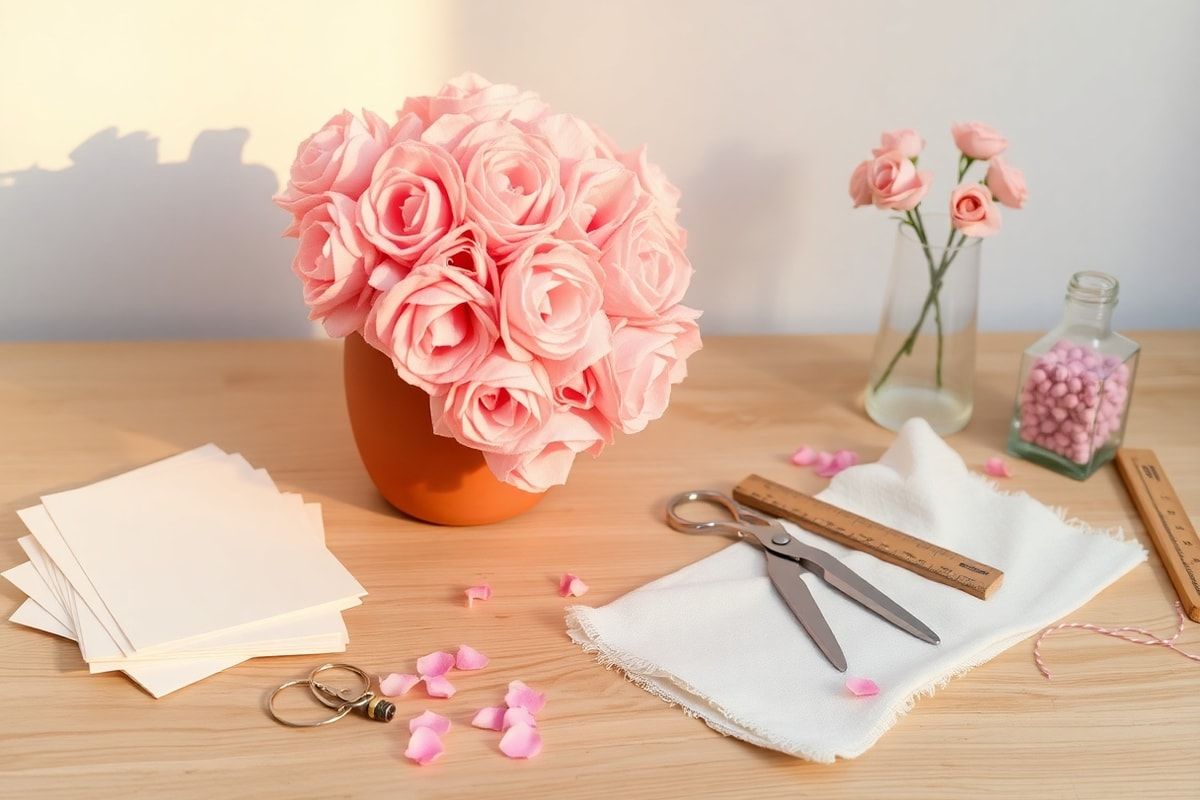
Hosting a baby shower is a joyful occasion, and what better way to celebrate than with a décor that’s as sweet and delicate as the little one on the way? Rose pom-poms are a fantastic choice—they’re soft, feminine, and effortlessly elegant. Whether you’re hanging them from the ceiling, adorning the gift table, or creating a stunning backdrop, these floral decorations will add a touch of romance and sophistication to your event. Best of all, they’re incredibly easy to make with just a few materials and some patience. In this tutorial, we’ll guide you through every step of crafting rose pom-poms, from selecting the right materials to assembling them into a show-stopping décor piece. Let’s get started!
Materials needed
- Crepe paper or tissue paper (rose-colored, preferably in shades like blush, dusty pink, or soft red)
- Scissors (sharp fabric scissors work best)
- Hot glue gun or craft glue (a glue gun is faster and more secure)
- Floral wire or thin craft wire (about 22-24 gauge)
- Wire cutters (if using floral wire)
- Ruler or measuring tape
- Pencil or pen
- Optional: Ribbon, twine, or string for hanging
Preparation steps
Step 1: Choose your paper and colors
For a cohesive look, select 2-3 shades of rose-colored crepe or tissue paper. Mixing shades adds depth and realism to your pom-poms. If you’re going for a monochromatic theme, stick to one color and vary the shades slightly. For a vintage vibe, opt for muted tones like mauve or antique rose. For a modern twist, brighter pinks or even white with a hint of blush work beautifully.
Crepe paper is ideal because it’s stretchy and easy to manipulate, but tissue paper can also work if that’s what you have on hand. Just be gentle when handling it to avoid tearing.
Step 2: Cut the paper into strips
Decide on the size of your pom-poms. For a baby shower, medium-sized pom-poms (8-12 inches in diameter) are perfect—they’re eye-catching but not overwhelming. To achieve this size, cut your paper into strips that are about 12-16 inches long and 2-3 inches wide. The length determines the fullness of the pom-pom, while the width affects the petal shape.
You’ll need approximately 20-30 strips per pom-pom, depending on how dense you want it. If you’re using multiple colors, alternate them to create a layered effect. Stack the strips neatly and secure them with a paperclip or a binder clip to keep them organized.
Assembly
Step 3: Create the petals
Now comes the fun part—shaping the petals! Take one strip of paper and fold it accordion-style (back and forth like a fan) to create a zigzag pattern. The folds should be about 0.5 to 1 inch apart, depending on the size of petal you want. The more folds you make, the fuller the rose will look.
Once folded, pinch the center of the strip to create a slight crease. This will help define the shape of the petal. Then, gently pull the two ends of the strip apart to fan out the folds. You should now have a ruffled strip that resembles a flower’s petals. Repeat this process for all your strips.
Pro tip: If you’re using different colors, arrange the strips in a gradient or random order to create a natural-looking bouquet effect.
Step 4: Assemble the rose
To assemble the rose, start by taking one ruffled strip and wrapping it around your finger or a thin object (like a pencil) to curl the petals slightly. This gives the rose a more organic and realistic look.
Next, take a second ruffled strip and place it around the first one, slightly overlapping the edges. Secure the center with a dab of hot glue or craft glue. Continue adding strips one by one, overlapping them slightly and gluing them in place, until you’ve built up a full rose. The more layers you add, the fuller the rose will appear.
Once your rose is the desired size, trim any excess paper from the bottom to create a flat base. If you’re using floral wire, thread it through the base of the rose and twist it to secure it. This wire will serve as the stem for your pom-pom. If you’re not using wire, you can attach a piece of twine or ribbon to the base for hanging.
Optional: For a more dramatic effect, you can create multiple roses and combine them into a larger pom-pom. Simply arrange the roses in a circular pattern and glue them together at the base, then attach a wire or string for hanging.
Mistakes to avoid
- Using too little glue: Don’t skimp on the glue! A weak hold will cause your pom-pom to unravel. Use a generous amount of hot glue or craft glue to ensure everything stays in place.
- Rushing the process: Take your time when folding and shaping the petals. Rushing can lead to uneven or messy-looking roses.
- Ignoring color balance: If you’re using multiple colors, distribute them evenly throughout the pom-pom. Clustering the same colors together can look unnatural.
- Overstuffing the pom-pom: While it’s tempting to make your pom-poms as big as possible, too many layers can weigh them down and make them difficult to hang. Aim for a balanced, full look without going overboard.
Pro tips
- Experiment with textures: Mix crepe paper with metallic tissue paper or glitter paper for a touch of sparkle. This works especially well for a baby shower with a modern or glam theme.
- Add greenery: Incorporate green crepe paper or even real ivy leaves into your pom-poms for a natural, garden-inspired look. This adds contrast and makes the roses pop.
- Vary the sizes: Create a mix of small, medium, and large pom-poms for a dynamic and layered décor. Hang them at different heights for visual interest.
- Use a template: If you’re struggling to create uniform petals, draw a simple flower shape on paper and use it as a template for cutting your strips. This ensures consistency in size and shape.
- Light it up: For a magical touch, add battery-operated fairy lights to your pom-poms. This is especially effective if you’re hanging them near a gift table or photo backdrop.
- Recycle materials: Don’t have crepe paper? Use old book pages, scrapbook paper, or even fabric scraps to create unique pom-poms with a personal touch.
Once your rose pom-poms are complete, it’s time to put them to good use! Here are a few ideas for incorporating them into your baby shower décor:
- Ceiling hanging: Suspend pom-poms at varying heights from the ceiling using fishing line or clear thread. This creates a dreamy, floating effect that guests will love.
- Photo backdrop: Arrange pom-poms in a large arch or garland to create a stunning backdrop for photos. Add a few faux greenery or baby-themed elements for extra charm.
- Gift table centerpiece: Cluster pom-poms around the gift table or use them to decorate gift boxes. You can also attach small tags with the baby’s name or a sweet message.
- Table runners: Create a table runner by attaching pom-poms to a piece of ribbon or twine. This adds a pop of color and texture to your dining table.
- Welcome sign: Hang a few pom-poms from a “Welcome” or “Baby [Last Name]” sign to frame it beautifully.
With these tips and tricks, you’ll be well on your way to creating a baby shower décor that’s as memorable as the celebration itself. Rose pom-poms are not only easy to make but also incredibly versatile—they can be adapted to fit any theme or color scheme. Whether you’re going for a soft and romantic vibe or a bold and modern look, these floral decorations will add a touch of elegance and charm to your event. So gather your materials, put on some relaxing music, and let your creativity flow. Happy crafting!