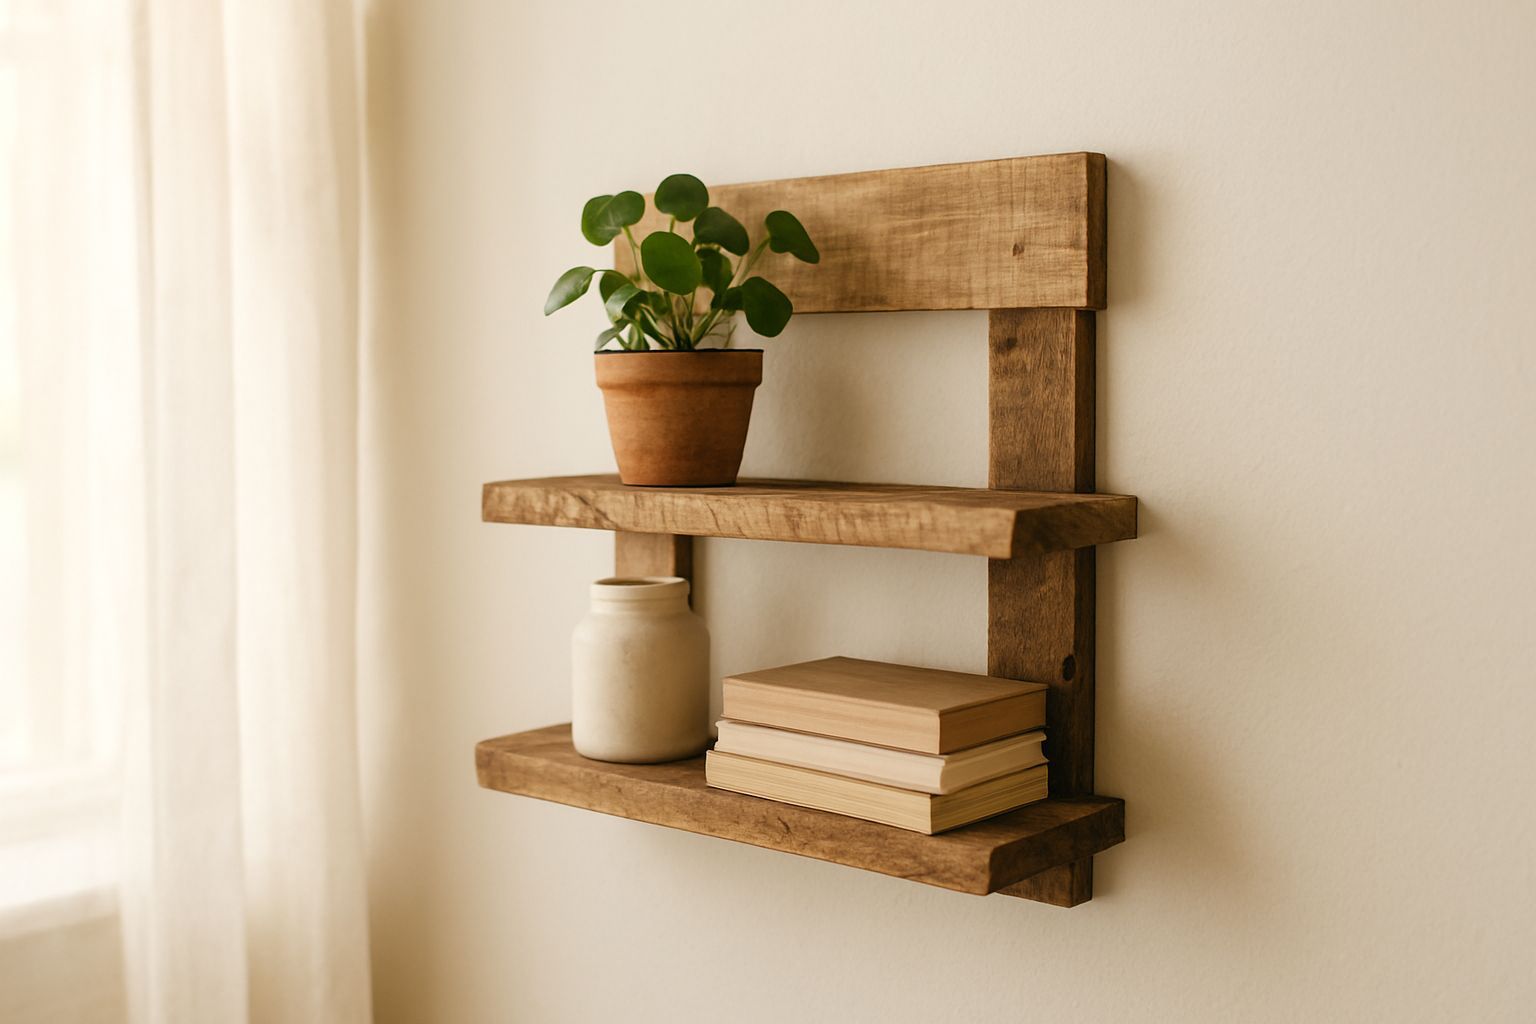
Hey there, fellow DIY enthusiasts! Sara here from HomeReadyHub, and today we’re diving into a project that’s not only incredibly rewarding but also fantastic for the environment: creating stunning wall shelves from recycled pallets. There’s something truly magical about taking discarded wood and transforming it into a functional piece of decor that tells a story. Pallet wood offers a unique rustic charm, a robustness that’s hard to beat, and best of all, it’s often free for the taking! Whether you’re looking to add storage to your kitchen, display cherished items in your living room, or organize your workshop, these shelves are a versatile and budget-friendly solution. This tutorial will walk you through every step, from sourcing your pallets to mounting your finished shelves, ensuring you build something beautiful and sturdy. So, roll up your sleeves, put on your safety gear, and let’s turn some humble pallets into show-stopping wall art!
Materials Needed
- Wooden Pallets: Look for "HT" (heat treated) stamps, avoid "MB" (methyl bromide) treated pallets, and check for excessive damage or spills. Aim for 2-3 pallets, depending on the size and number of shelves you plan to build.
- Safety Gear: Work gloves, safety glasses, ear protection, and a dust mask.
- Pry Bar & Hammer: Essential for carefully disassembling pallets.
- Saw: A circular saw, jigsaw, or even a good hand saw will work for cutting your wood to size.
- Drill/Driver: For pre-drilling holes and driving screws.
- Measuring Tape & Pencil: For accurate measurements and markings.
- Sander & Sandpaper: An orbital sander is ideal, with grits ranging from 80-grit (coarse) to 220-grit (fine).
- Wood Glue: For strong, lasting joints.
- Wood Screws or Nails: 1.5-inch to 2.5-inch wood screws are generally best for strength.
- Wood Stain, Paint, or Sealant: Your choice for finishing the wood.
- Brushes or Rags: For applying finishes.
- Level: Crucial for ensuring your shelves are mounted straight.
- Stud Finder: To locate wall studs for secure mounting.
- Wall Anchors/Mounting Screws: Heavy-duty screws (2.5-3 inches) if mounting into studs, or appropriate wall anchors for drywall.
Preparation Steps
Step 1: Sourcing and Inspecting Your Pallets
The first and arguably most important step is finding the right pallets. Not all pallets are created equal! Look for pallets stamped with an "HT" – this means they've been heat-treated, a safe and chemical-free method of pest control. Absolutely avoid any pallets marked "MB" (methyl bromide), as these have been chemically treated and are not safe for indoor use. Also, give your potential pallets a thorough inspection. Check for excessive damage, rot, mold, or any signs of chemical spills. A few scuffs and dings add character, but structural integrity is key. Good places to look are local businesses, construction sites (ask permission first!), or even sometimes on online marketplaces.
Step 2: Deconstructing the Pallets
This step requires patience and a bit of muscle. Put on your safety glasses, gloves, and ear protection! The goal is to remove the planks from the stringers (the thicker support beams) with as little damage as possible. Start by placing the pallet on its side. Using your pry bar and hammer, gently work the pry bar under the ends of each plank where it connects to the stringer. Apply steady pressure, wiggling the pry bar to loosen the nails. If a plank is particularly stubborn, you might need to cut through the nails with a reciprocating saw or simply cut the plank on either side of the stringer. Be mindful of flying nails and splinters. Once the planks are free, use the hammer to remove any remaining nails from the wood. Sort your planks by condition – some will be perfect for shelf surfaces, others might be better for supports or can be cut to remove damaged sections.
Step 3: Cleaning and Sanding the Wood
With your planks liberated, it's time to clean them up. Use a stiff brush to remove any dirt, dust, or debris. For stubborn grime, a damp cloth with a mild detergent can work, but ensure the wood dries completely afterward. Now comes the sanding – this is where the magic really happens, transforming rough pallet wood into a smooth, touchable surface. Start with a coarse 80-grit sandpaper on your orbital sander to remove any remaining rough spots, deep splinters, and surface imperfections. Work your way up to 120-grit, then finish with 180-grit or 220-grit for a silky-smooth finish. Pay extra attention to the edges and corners. This step is crucial not just for aesthetics, but also for preventing splinters and preparing the wood to properly absorb any finish you apply.
Step 4: Planning Your Design and Cutting
Before you make any cuts, it’s time to decide on your shelf design. Do you want simple floating shelves? Box-style shelves? How long and deep do you want them to be? Sketch out your ideas and take precise measurements. For a basic box shelf, you’ll need two side pieces, a top, a bottom, and a back piece (optional but recommended for stability and easy mounting). For a simple plank shelf, you just need the plank itself and some sturdy brackets or hidden supports. Once you have your dimensions, carefully measure and mark your pallet wood planks. Use your circular saw or jigsaw to make clean, straight cuts. Remember the old carpenter's adage: "Measure twice, cut once!" Ensure all your pieces are square and the correct length before moving on.
Assembly
Step 5: Assembling the Shelf Units
With your wood cut and sanded, it's time to bring your shelves to life! For a box-style shelf, start by applying a thin, even layer of wood glue to the ends of your side pieces where they will meet the top and bottom pieces. Clamp the pieces together, ensuring they are square, and then pre-drill pilot holes to prevent splitting the wood. Drive your wood screws into place. For extra strength, you can add screws from multiple angles. If you're adding a back panel, glue and screw it into place as well. For simple plank shelves, this step is skipped, as the planks will be directly mounted to the wall or supported by brackets.
Step 6: Finishing Touches
Now for the fun part – giving your shelves their final look! This is where you can truly personalize your project. You can choose to stain the wood to enhance its natural grain and color, paint it to match your decor, or simply apply a clear sealant to protect the raw wood while preserving its rustic appeal. If staining, apply the stain evenly with a brush or rag, wiping off any excess after a few minutes according to the product instructions. For painting, apply thin, even coats, allowing adequate drying time between each. If you're opting for a natural look, a few coats of polyurethane or a clear wax will provide excellent protection. Always work in a well-ventilated area and allow your shelves to dry completely before handling or mounting.
Step 7: Mounting Your Shelves
Proper wall mounting is crucial for safety and stability. First, decide on the exact placement of your shelves. Use your stud finder to locate wall studs – mounting into studs offers the strongest support. Mark the stud locations with a pencil. Hold your shelf (or the mounting bracket/cleat if using a floating shelf design) against the wall at the desired height and use a level to ensure it's perfectly straight. Mark the screw hole locations. Pre-drill pilot holes into the wall (and into the shelf if necessary). If you can't hit a stud, you'll need to use heavy-duty drywall anchors appropriate for the weight your shelves will hold. Drive your long screws through the shelf (or its mounting hardware) and into the wall studs or anchors. Double-check with your level one last time. Give the shelf a gentle tug to ensure it's secure before loading it with items.
Mistakes to Avoid
- Ignoring Pallet Stamps: Never use "MB" (methyl bromide) treated pallets. Always look for "HT" (heat treated).
- Skipping Safety Gear: Splinters, flying nails, and sawdust are real hazards. Always wear gloves, safety glasses, and a dust mask.
- Insufficient Sanding: Rushing this step will result in rough, splintery shelves that are unpleasant to touch and difficult to clean.
- Improper Deconstruction: Haphazardly tearing apart pallets can damage the wood, making it unusable for your project.
- Uneven Cuts: Crooked cuts will lead to wobbly, ill-fitting shelves. Take your time and use guides.
- Poor Wall Mounting: Failing to secure shelves properly to wall studs or using inadequate anchors can lead to shelves falling, causing damage or injury.
- Overloading Shelves: Even well-mounted shelves have weight limits. Be mindful of what you place on them.
Pro Tips
- Embrace Imperfections: Pallet wood often has nail holes, knots, and variations in color. These aren't flaws; they're character! Highlight them with your finish.
- Consider Hidden Mounting: For a sleek, floating look, you can create a French cleat system or use specialized floating shelf brackets.
- Mix & Match Wood: Don't be afraid to combine pallet wood with other types of wood or even metal elements for a more unique, industrial aesthetic.
- Test Finishes: Always test your chosen stain or paint on a scrap piece of pallet wood first. Pallet wood can be unpredictable in how it absorbs finishes.
- Add a Back Panel: For box shelves, a thin plywood back panel (even from another pallet) adds stability and makes mounting much easier, as you can screw through it directly into studs.
- Router Edges: If you have a router, consider adding a decorative edge profile to your shelf planks for a more finished, custom look.
- Creative Layouts: Instead of a single straight shelf, consider staggered shelves, corner units, or a modular system to create an artistic display.
- Wax for Protection: After staining or painting, a good quality furniture wax can add an extra layer of protection and a beautiful soft sheen.
And there you have it – your very own set of beautiful, eco-friendly, and incredibly stylish recycled pallet wall shelves! This project is more than just building; it's about giving new life to discarded materials, adding personality to your home, and gaining a huge sense of accomplishment. Each knot and nail hole tells a story, making your shelves truly one-of-a-kind. Don't be afraid to experiment with different finishes, sizes, and arrangements to perfectly suit your space and style. We'd absolutely love to see your creations, so once you've installed your masterpiece, snap a photo and share it with the HomeReadyHub community! Happy building!