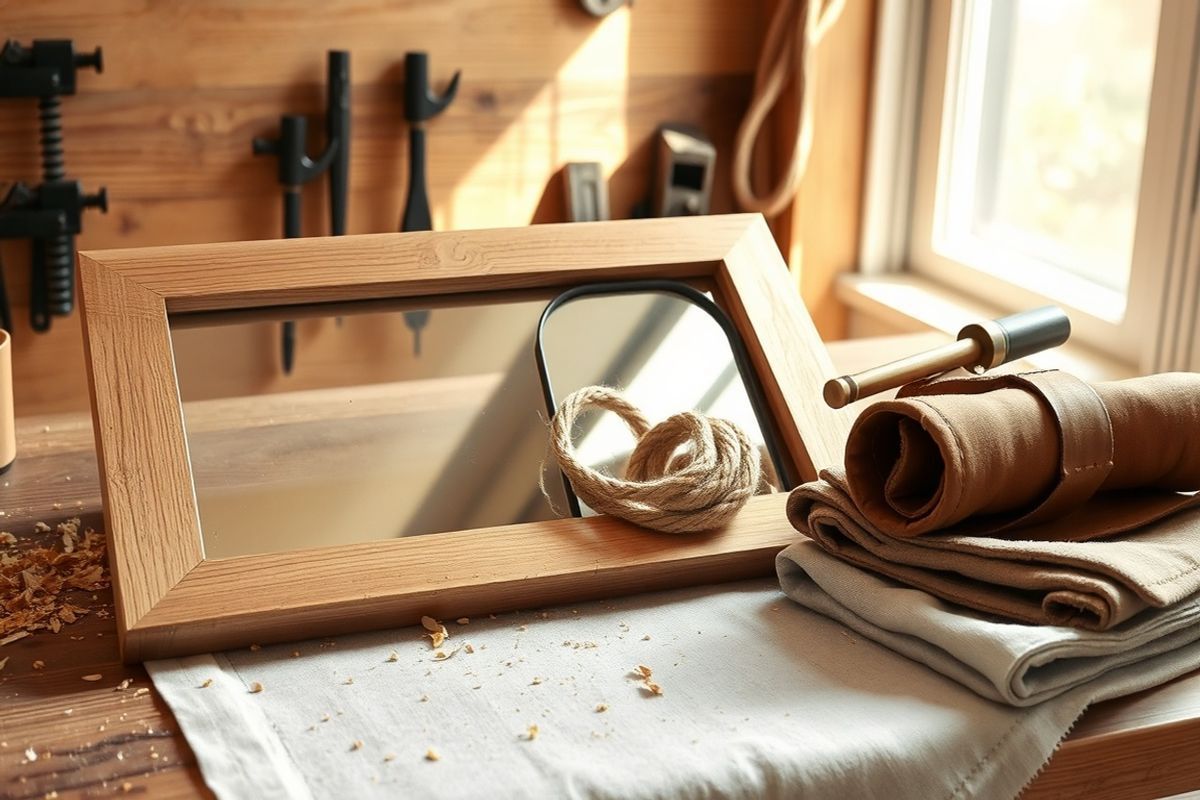
Welcome back to HomeReadyHub, fellow DIY enthusiasts! Are you looking for a way to infuse your living space with warmth, character, and a touch of rustic elegance? There’s nothing quite like the natural beauty of wood to achieve that cozy, inviting aesthetic. Today, we’re diving into a project that’s both rewarding and surprisingly achievable for DIYers of all skill levels: crafting your very own raw wood framed mirror. Imagine a stunning focal point that reflects not just your image, but also your personal style and craftsmanship. This project is perfect for adding a statement piece to an entryway, bedroom, or living room, and it allows you to choose the exact dimensions and wood type to perfectly complement your existing decor. Forget generic store-bought frames; let’s create a bespoke mirror that truly feels like home. Let’s gather our tools and get started on transforming a simple mirror into a handcrafted masterpiece!
Materials Needed
- Unframed Mirror: Choose your desired size and shape. Ensure it’s clean and free of chips.
- Raw Lumber: (e.g., Pine, Oak, Maple, Cedar) – Select straight, knot-free boards. Common dimensions are 1x3, 1x4, or 1x6, depending on your desired frame width. You'll need enough to create four frame pieces plus a little extra for mistakes.
- Plywood or Hardboard: A thin sheet (1/4 inch or less) for the mirror backing, cut to the outer dimensions of your mirror.
- Miter Saw or Miter Box with Hand Saw: For precise 45-degree cuts.
- Tape Measure and Pencil: For accurate marking.
- Safety Glasses and Dust Mask: Essential for eye and respiratory protection.
- Sandpaper: Various grits (e.g., 80-grit, 120-grit, 220-grit) for smoothing the wood.
- Wood Glue: High-quality wood glue for strong joints.
- Wood Clamps (Corner Clamps or Bar Clamps): To hold the frame pieces securely while the glue dries.
- Brad Nailer (with 1-1.5 inch brad nails) or Hammer and Finish Nails: For reinforcing joints.
- Drill and Small Screws: For attaching the backing and hanging hardware.
- Mirror Clips or Retention Strips (Optional): If not using adhesive to secure the mirror.
- Mirror Adhesive or Silicone Caulk (Neutral Cure): Specifically designed for mirrors, if not using clips.
- Picture Hanging Hardware: D-rings, picture wire, or a French cleat, suitable for the mirror's weight.
- Wood Conditioner, Stain, or Sealer (Optional): If you want to protect the raw wood while maintaining its natural look (e.g., a matte clear coat or natural oil).
- Clean Rags or Paper Towels: For wiping excess glue or dust.
Preparation Steps
Step 1: Measure and Cut Your Wood
Precision is paramount in this step. Begin by accurately measuring the length and width of your unframed mirror. For a typical frame, you’ll want the inside edge of your frame to be slightly smaller than the mirror itself (e.g., 1/16 to 1/8 inch smaller on each side) to create a lip that holds the mirror securely. Determine the desired width of your frame (e.g., 3 inches). Now, calculate the length of your four frame pieces. Remember, for mitered corners, the measurement refers to the *longest* edge of the miter. For example, if your mirror is 24x36 inches and your frame is 3 inches wide, your short pieces will be approximately 24 inches (mirror width) + (2 x 3 inches frame width) = 30 inches on the longest edge of the miter. Your long pieces will be 36 inches (mirror length) + (2 x 3 inches frame width) = 42 inches. It's always a good idea to cut your first piece, then use it as a template for the opposite piece to ensure perfect symmetry.
Using your miter saw (or miter box), set the blade to a precise 45-degree angle. Carefully cut four pieces of lumber, ensuring that the angles are opposing for each pair (like a picture frame). Take your time, double-check your measurements, and make clean cuts. Once all four pieces are cut, use your sandpaper, starting with 80-grit and progressing to 120-grit and then 220-grit, to thoroughly smooth all surfaces and edges of your frame pieces. Pay extra attention to the cut ends to ensure they are perfectly smooth for a tight joint.
Step 2: Dry Fit and Refine
Before applying any glue, it’s crucial to perform a dry fit of your frame. Lay out your four cut pieces on a flat, clean surface, arranging them as they will be assembled. Gently push the corners together to check for tight, gap-free joints. The goal is to have perfectly flush corners with no light showing through. If you notice any small gaps, you can make minor adjustments by carefully sanding the mitered edges or, if using a miter saw, making a tiny, precise shave off the end. This step is critical for a professional-looking finish. Also, place your mirror into the dry-fitted frame to ensure it fits snugly but not too tightly. You want it to rest comfortably within the frame's lip. Once you're satisfied with the fit of all four corners and the mirror, give your frame pieces one last wipe-down to remove any dust or debris from sanding, preparing them for assembly.
Assembly
Step 3: Assemble the Frame
Now for the exciting part – bringing your frame to life! Apply a thin, even bead of wood glue to one mitered edge of each joint. Be careful not to use too much, as excess glue can squeeze out and be difficult to clean once dry, potentially affecting any future finishing. Bring the two pieces together, aligning the corners perfectly. Use your corner clamps or bar clamps to hold the joint firmly in place, ensuring the pieces are flush on all sides. Repeat this process for all four corners. Once all corners are clamped, check for squareness across the entire frame. If any corner seems slightly off, gently adjust the clamps until the frame is square. Wipe away any excess glue that squeezes out with a damp rag immediately. Allow the glue to dry completely according to the manufacturer’s instructions, which is typically several hours or overnight. For added strength, once the glue is dry and clamps are removed, you can reinforce each corner with two or three brad nails driven from the outside edge into the mitered joint, or use small finish nails and a hammer.
Step 4: Install the Mirror and Backing
With your frame fully assembled and dry, it’s time to install the mirror. Carefully lay the frame face down on a clean, soft surface (like a blanket or towel) to protect the front. Gently place the mirror into the frame opening. It should fit snugly against the inside lip you created. To secure the mirror, you have a few options: you can use mirror clips screwed into the back of the frame, small retention strips of wood, or a bead of neutral cure mirror adhesive. If using adhesive, apply a continuous bead around the perimeter of the mirror, ensuring it makes contact with both the mirror and the frame’s back lip. Allow the adhesive to cure as per instructions.
Once the mirror is secure, place your pre-cut plywood or hardboard backing over the back of the mirror. This backing will protect the mirror and provide a stable surface for mounting your hanging hardware. Secure the backing to the frame using small screws (pre-drilling pilot holes is recommended to prevent splitting the wood) or small brad nails, spaced every 4-6 inches around the perimeter. Finally, attach your chosen picture hanging hardware (D-rings, picture wire, or a French cleat) to the back of the frame, ensuring it's centered and rated for the combined weight of your mirror and frame. Always use robust hardware for heavy mirrors.
Mistakes to Avoid
- Inaccurate Measurements: The most common culprit for gappy corners. Measure twice, cut once! Even a millimeter off can create noticeable gaps.
- Rushing Glue Drying Time: Wood glue needs adequate time to cure to achieve its maximum strength. Removing clamps too soon can compromise the integrity of your frame.
- Not Using Clamps: Clamps provide the necessary pressure to create strong, tight joints. Hand-holding is not sufficient.
- Forgetting Safety Gear: Always wear safety glasses when cutting and a dust mask when sanding. Wood dust can be harmful.
- Using the Wrong Adhesive for Mirrors: Regular construction adhesives can contain chemicals that react with and damage the silvering on the back of a mirror, leading to dark spots. Always use mirror-specific adhesive or neutral cure silicone.
- Improper Sanding: Skipping grits or not sanding thoroughly can leave scratches or rough patches that will be very noticeable, especially on raw wood.
- Ignoring Wood Grain: When cutting, be mindful of the grain direction. Cutting against the grain can lead to tear-out, especially with miter cuts.
- Over-tightening Screws: When attaching the backing or hanging hardware, overtightening screws can split the wood, especially near the edges. Pre-drill pilot holes.
Pro Tips
- Choose Your Wood Wisely: Pine is affordable and easy to work with, but oak or maple offer a more premium, durable feel with beautiful grain patterns. Cedar provides a unique aroma and rustic look. Consider how the natural color and grain will complement your space.
- Add a Chamfer or Bevel: For a more refined look, consider using a router or a sanding block to add a slight chamfer (a 45-degree angle) or a small bevel to the inner edge of the frame. This subtle detail can significantly elevate the finished piece.
- Practice Cuts: If you're new to using a miter saw, practice your 45-degree cuts on scrap wood until you feel confident and can achieve consistent, tight angles.
- Reinforce Corners with Splines: For an incredibly strong and decorative joint, consider cutting small dados (grooves) across the mitered corners and inserting thin strips of contrasting wood (splines) with glue. This adds both strength and a beautiful detail.
- Maintaining the 'Raw' Look: To protect your raw wood frame without significantly altering its appearance, consider a matte clear coat, a natural tung oil, or a beeswax finish. These options will seal and protect the wood while preserving its natural texture and color.
- Clean Your Mirror Like a Pro: Use a microfiber cloth and a homemade cleaning solution (equal parts water and white vinegar) for a streak-free shine. Avoid harsh chemicals that could damage the mirror's backing or the wood finish.
- Consider Weight When Hanging: Mirrors can be heavy. Always use appropriate wall anchors (toggle bolts for drywall, masonry anchors for brick/concrete) if you're not screwing directly into a wall stud. Your hanging hardware should be rated for at least twice the weight of your mirror.
- Batch Your Sanding: Sand all pieces thoroughly before assembly. It's much easier to sand flat boards than a fully assembled frame with tight corners.
And there you have it – a stunning, handcrafted raw wood framed mirror, ready to adorn your walls! This project is more than just building a frame; it’s about creating a piece of art that reflects your dedication, creativity, and unique style. The beauty of raw wood lies in its imperfections and natural variations, making each mirror truly one-of-a-kind. Step back and admire your handiwork, knowing you’ve brought a piece of nature’s elegance into your home. Don't be afraid to personalize it further with a light distressing technique or a subtle stain if you ever decide to change its look down the line. We can't wait to see your raw wood mirror creations! Share your finished projects with us on social media using #HomeReadyHubDIY. Happy crafting!