Introduction
Your remote control and keyboard are some of the most frequently used items in your home, yet they are rarely cleaned. Dust, crumbs, and germs accumulate over time, making them a hotspot for bacteria and dirt. Regular cleaning not only extends the lifespan of your devices but also ensures a hygienic experience. In this guide, we’ll walk you through the safest and most effective methods to clean both your remote control and keyboard without causing damage. Whether you prefer using household items or specialized cleaning products, you’ll find a method that suits your needs.
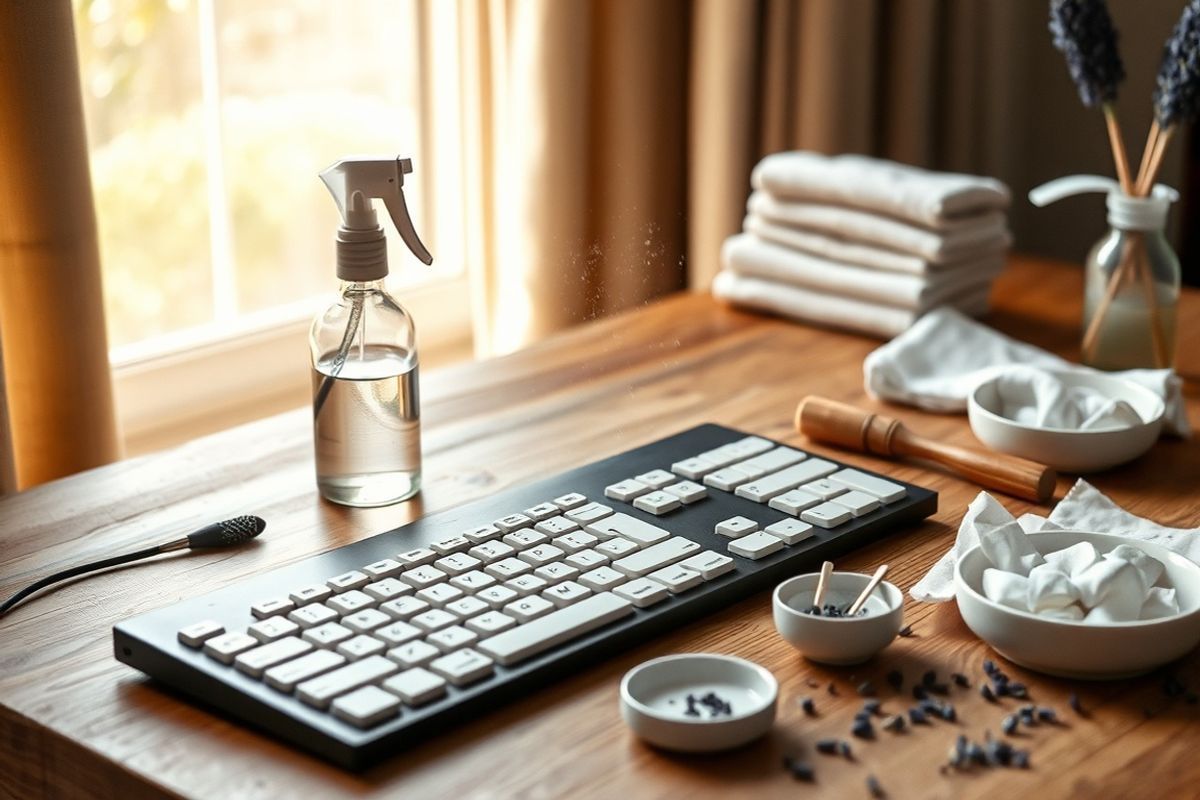
Materials Needed
Before you start, gather the following supplies to ensure a thorough and safe cleaning process:
- Microfiber cloth or a soft lint-free cloth
- Isopropyl alcohol (70% or higher) or rubbing alcohol
- Cotton swabs (Q-tips) or a soft-bristle brush
- Distilled water (for a mild cleaning solution)
- Mild dish soap (optional, for deeper cleaning)
- Compressed air can (for removing debris from crevices)
- Toothpick or wooden skewer (for stubborn grime)
- Disinfectant wipes (optional, for quick cleaning)
- Rubber gloves (optional, for hygiene)
Preparation Steps
Before diving into the cleaning process, it’s important to prepare your devices and workspace to avoid any mishaps or damage.
Step 1: Power Off and Unplug
Turn off and unplug both your remote control and keyboard to prevent any electrical hazards. This is especially important if you’re using liquid-based cleaning solutions. For wireless devices, simply remove the batteries to ensure no accidental activation occurs.
Step 2: Remove Loose Debris
Use compressed air to blow away dust, crumbs, and other loose particles from the crevices of your keyboard and remote control. Hold the device at an angle and use short bursts of air to avoid pushing debris further inside. For stubborn particles, gently tap the device or use a soft brush to dislodge them.
Cleaning the Remote Control
Step 3: Wipe Down the Surface
Dampen a microfiber cloth with a small amount of isopropyl alcohol or a mix of distilled water and a few drops of mild dish soap. Wring out excess liquid to avoid dripping inside the device. Gently wipe the entire surface of the remote, paying extra attention to the buttons and seams. Avoid pressing the buttons while cleaning to prevent accidental presses.
Step 4: Clean Between the Buttons
Use a cotton swab dipped in isopropyl alcohol or distilled water to clean around and between the buttons. For tight spaces, you can also use a soft-bristle brush or a toothpick wrapped in a microfiber cloth to dislodge grime. Be cautious not to apply excessive pressure to avoid damaging the buttons.
Step 5: Disinfect the Remote
For a deeper clean, use a disinfectant wipe or a cloth dampened with rubbing alcohol to thoroughly disinfect the remote. Focus on high-touch areas like the power button and directional pad. Allow the remote to dry completely before reinserting the batteries and testing it.
Cleaning the Keyboard
Step 6: Remove Keycaps (Optional)
If your keyboard has removable keycaps (common in mechanical keyboards), gently pry them off using a keycap puller or a flat tool like a plastic card. Place the keycaps in a bowl of warm, soapy water and let them soak for a few minutes. Use a soft brush to clean each keycap individually, then rinse and dry them thoroughly. For non-removable keyboards, skip this step.
Step 7: Clean the Keyboard Surface
Dampen a microfiber cloth with isopropyl alcohol or a mild soapy solution. Wipe down the entire surface of the keyboard, including the sides and top. For sticky keys, use a cotton swab dipped in rubbing alcohol to clean around the edges of each key. Avoid soaking the keyboard to prevent liquid from seeping underneath.
Step 8: Clean Between the Keys
Use compressed air to blow out debris from between the keys. If compressed air isn’t enough, use a soft-bristle brush or a toothpick to gently remove stubborn grime. For deeper cleaning, you can use a cotton swab dipped in isopropyl alcohol to clean the gaps between the keys. Be careful not to apply too much pressure to avoid damaging the keys.
Step 9: Reassemble and Test
If you removed the keycaps, reattach them once they are completely dry. Plug in your keyboard (or insert batteries if it’s wireless) and test each key to ensure it’s working properly. If any keys are sticky or unresponsive, repeat the cleaning process for that specific key.
Mistakes to Avoid
While cleaning your remote control and keyboard, steer clear of these common mistakes to prevent damage:
- Using excessive liquid: Avoid pouring water or cleaning solutions directly onto the devices. Always use a damp (not wet) cloth to prevent liquid from seeping inside and causing short circuits.
- Using abrasive materials: Never use paper towels, rough sponges, or abrasive cleaners as they can scratch the surface of your devices.
- Skipping the drying process: Always allow your remote control and keyboard to dry completely before using them again. Residual moisture can damage the internal components.
- Using harsh chemicals: Avoid cleaners with bleach, ammonia, or strong solvents as they can corrode the plastic or rubber parts of your devices.
- Applying too much pressure: Be gentle when cleaning buttons and crevices to avoid breaking the keys or dislodging the internal mechanisms.
Pro Tips
Follow these expert tips to make your cleaning process even more effective and efficient:
- Clean regularly: Make it a habit to clean your remote control and keyboard at least once a month to prevent the buildup of dirt and germs.
- Use a UV-C sanitizer: For an extra layer of hygiene, consider using a UV-C sanitizer to kill bacteria and viruses on your remote control and keyboard.
- Store your cleaning supplies together: Keep a small kit with all the necessary cleaning tools in one place so you can clean your devices quickly and efficiently whenever needed.
- Check the manufacturer’s guidelines: If your remote or keyboard is under warranty, refer to the manufacturer’s instructions to ensure you’re using the safest cleaning methods.
- Use a keyboard cover: If you’re prone to spills, consider using a silicone keyboard cover to protect against liquid damage. Just remove and clean the cover as needed.
- Avoid eating near your devices: Crumbs and food particles are the biggest culprits behind sticky keys and dirty remotes. Try to keep food and drinks away from your workspace.
Conclusion
Cleaning your remote control and keyboard doesn’t have to be a daunting task. With the right tools and techniques, you can easily remove dirt, grime, and germs while keeping your devices in top condition. Regular maintenance not only enhances the lifespan of your remote and keyboard but also promotes a healthier living environment. Whether you’re tackling a quick wipe-down or a deep clean, always remember to handle your devices with care and avoid harsh chemicals or excessive moisture. By following the steps outlined in this guide, you’ll enjoy a cleaner, more functional remote control and keyboard for years to come.
Share your cleaning tips and experiences in the comments below! If you found this guide helpful, don’t forget to bookmark it for future reference and share it with friends and family who might benefit from these cleaning hacks.