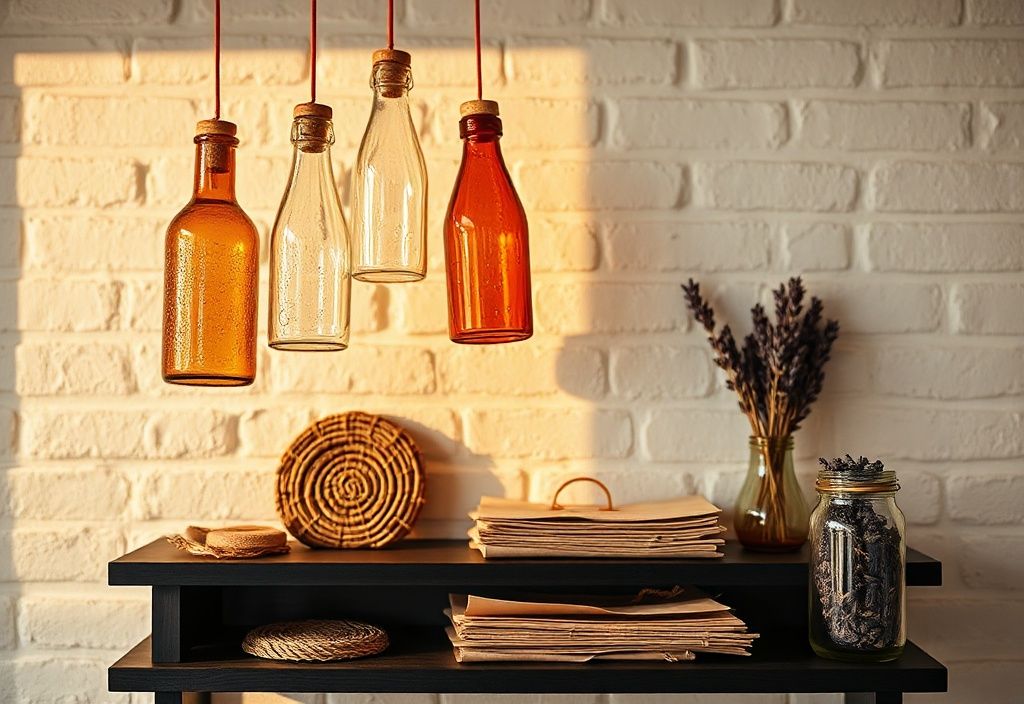
Welcome to HomeReadyHub! If you're looking for a stylish, eco-friendly way to brighten up your space, this tutorial is for you. Upcycling glass bottles into suspensions is not only a fun DIY project but also a sustainable way to repurpose materials you might otherwise discard. Whether you're decorating for a special occasion or adding a touch of elegance to your home, these suspended glass bottle decorations are a fantastic choice. Let’s dive in!
Materials needed
- Glass bottles (wine, soda, or any clean glass bottles)
- Twine, fishing line, or thin wire (for suspension)
- Scissors or wire cutters
- Ruler or measuring tape
- Permanent marker or painter’s tape (for marking)
- Hot glue gun or strong adhesive (optional, for securing wires)
- Decorative elements (optional: paint, glitter, or ribbons)
- Hooks or ceiling fixtures (for hanging)
Preparation steps
Step 1: Clean the bottles thoroughly
Start by removing any labels, glue residue, or dirt from your glass bottles. Soak them in warm, soapy water for a few minutes to loosen stubborn glue. Use a scrubbing pad or sponge to clean the interior and exterior. For stubborn residue, a mixture of vinegar and baking soda can work wonders. Rinse well and let them dry completely to avoid water spots or mold growth inside the finished piece.
Step 2: Plan your design and measure
Before you start cutting or drilling, decide on the layout of your suspension. Will you hang the bottles in a straight line, a cluster, or a geometric pattern? Sketch your design on paper to visualize the final look. Once you’re happy with the plan, measure the distance between each bottle and mark the suspension points on the bottles using a permanent marker or painter’s tape. Typically, the suspension point is about 2-3 inches from the top of the bottle, but this can vary based on your design.
Assembly
Step 3: Create suspension holes or loops
There are two main methods to attach the suspension material to your bottles:
Method 1: Drilling holes
If you’re comfortable using a drill, you can create small holes on opposite sides of the bottle neck. Use a diamond-tipped drill bit for glass to avoid cracking. Place the bottle on a soft cloth to stabilize it, and drill slowly to create two small holes about 1 inch apart. Thread your twine, fishing line, or wire through the holes to create a loop for hanging. Secure the ends with a knot or a dab of hot glue to prevent slipping.
Method 2: Creating wire loops
If drilling isn’t an option, you can use thin wire to create loops around the bottle neck. Wrap the wire tightly around the neck, leaving enough length to attach the suspension material. Twist the ends together to secure the loop, and then attach your twine or fishing line to the wire loop using a knot or a small clamp.
Step 4: Attach suspension material and decorate
Cut your suspension material (twine, fishing line, or wire) to the desired length. For a uniform look, measure and cut all pieces to the same length. Thread one end through the hole or loop you created in Step 3 and tie a secure knot. If you’re using multiple suspension points (for example, a cluster of bottles), you can attach the twine to a central ring or hook before hanging.
Now’s the time to get creative! If you want to add a personal touch, consider painting the bottles with glass paint or adding glitter to the suspension material. You can also wrap ribbons or beads around the twine for extra sparkle. Let any decorations dry completely before moving to the next step.
Mistakes to avoid
- Using dirty or wet bottles: Always ensure bottles are clean and dry before starting. Residue or moisture can ruin the final look and even cause mold growth.
- Skipping the design plan: Without a clear plan, your suspension might look uneven or cluttered. Take the time to sketch your design and measure carefully.
- Using weak suspension material: Avoid thin or frayed twine, as it may snap under the weight of the bottle. Opt for strong, durable materials like fishing line or coated wire.
- Ignoring ceiling fixtures: Make sure your ceiling hooks or fixtures are securely attached and can support the weight of the bottles. Use anchors if hanging from drywall or plaster.
- Rushing the drying process: If you’re painting or decorating the bottles, allow ample time for everything to dry completely before hanging. Rushing can lead to smudges or uneven finishes.
Pro tips
- Mix and match bottle sizes: For a dynamic look, use bottles of varying heights and shapes. This adds visual interest and makes your suspension feel more organic.
- Incorporate lighting: Place small LED string lights inside the bottles or hang them around the suspension for a magical glow. This works especially well in dimly lit areas like patios or dining rooms.
- Experiment with colors: Use colored glass bottles or paint the bottles in pastel shades for a soft, dreamy effect. Metallic paints can add a modern, glamorous touch.
- Add greenery: Place small potted plants or dried flowers inside the bottles for a fresh, natural look. This is a great way to bring a bit of the outdoors inside.
- Create a theme: Choose a theme for your suspension, such as coastal (blue and white bottles), rustic (amber bottles with burlap twine), or bohemian (mismatched colors and textures). A cohesive theme ties the look together beautifully.
- Double-check your knots: Before hanging, tug gently on each suspension point to ensure it’s secure. A loose knot can lead to a fallen bottle and a lot of frustration!
Upcycling glass bottles into suspended decorations is a rewarding project that combines creativity, sustainability, and style. Whether you’re sprucing up your living room, dining area, or outdoor space, these DIY suspensions are sure to impress. Plus, you’ll love knowing you’ve given new life to materials that might have ended up in the recycling bin.
We’d love to see your creations! Share your photos with us on social media using the hashtag #HomeReadyHubUpcycle. Happy crafting!
