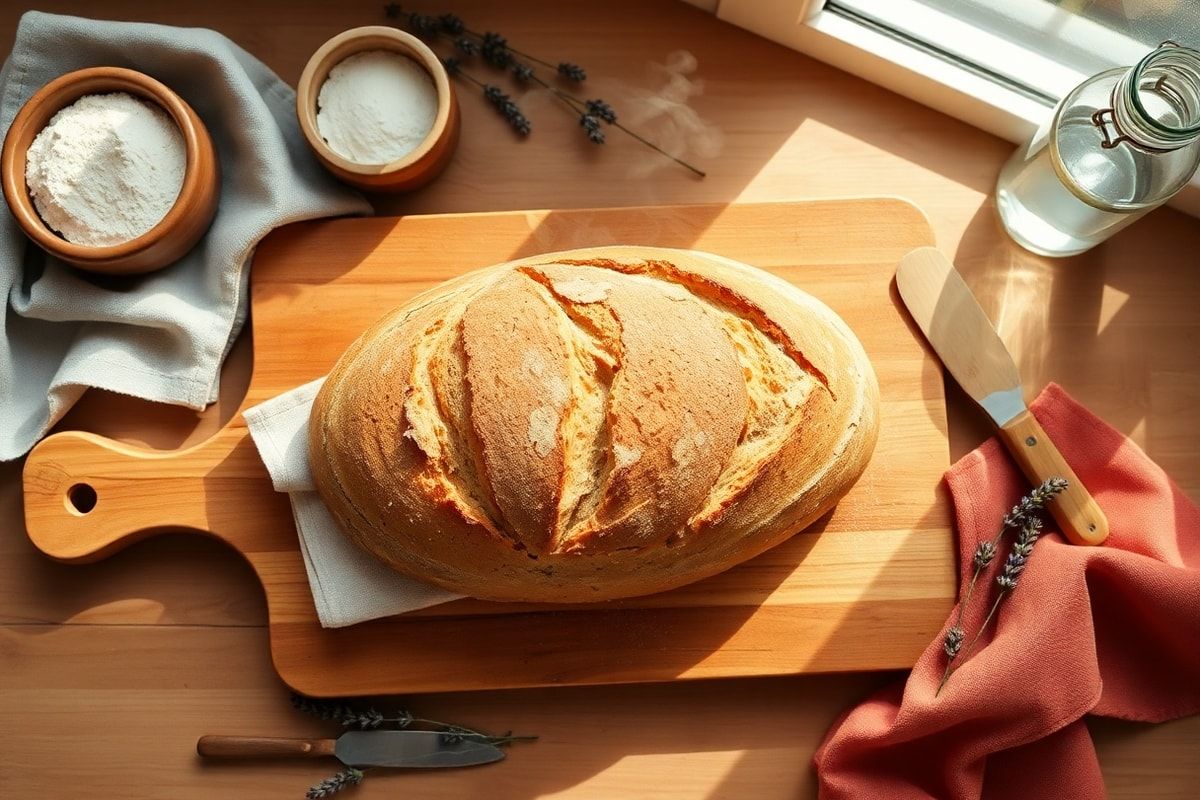
If you’ve ever dreamed of baking a crusty, golden loaf of sourdough bread with an open crumb and deep, tangy flavor, then pain au levain naturel is your ultimate goal. Unlike commercial yeast bread, this traditional French sourdough is leavened using a natural starter made from flour and water—a living culture that transforms simple ingredients into a masterpiece of artisanal baking.
Baking with a natural levain (or sourdough starter) requires patience, precision, and a bit of practice, but the result is worth every minute. A well-made pain au levain has a crisp, shatteringly thin crust, an airy interior with irregular holes, and a complex flavor profile that balances acidity, sweetness, and earthiness. Whether you're a seasoned bread baker or just starting your fermentation journey, this guide will walk you through every step—from creating your starter to shaping and baking your first sourdough loaf.
Materials Needed
- Levain: A mature sourdough starter (100% hydration, active and bubbly)
- Bread flour: High-quality unbleached bread flour (about 500g for 2 loaves)
- Water: Filtered or dechlorinated water, room temperature (around 75–80°F / 24–27°C)
- Salt: Fine sea salt or kosher salt (about 10g per 500g flour)
- Digital kitchen scale: For accurate measurements (grams, not cups)
- Large mixing bowl: Preferably a dough-friendly bowl (stainless steel or food-grade plastic)
- Dough scraper: A plastic or metal bench scraper for handling sticky dough
- Clean kitchen towel or plastic wrap: For covering the dough during bulk fermentation
- Banneton (proofing basket): A 9-inch round or oval proofing basket for shaping (lined with a floured towel if no banetton)
- Dutch oven or baking stone: A heavy Dutch oven (like Le Creuset) or a baking stone with a steam pan
- Parchment paper: For easy transfer of the shaped loaf
- Lame or sharp razor: For scoring the dough before baking
- Oven thermometer: To ensure your Dutch oven is at the right temperature (recommended: 475°F / 245°C)
Preparation Steps
Step 1: Prepare Your Levain
Your sourdough starter is the heart of this recipe. It should be active, bubbly, and at its peak before you begin mixing the dough. Ideally, feed your starter 4–12 hours before mixing to ensure it’s ready.
- Take 20g of active levain from your starter.
- Mix it with 100g water and 100g bread flour in a clean jar.
- Cover loosely and let it ferment at room temperature (around 70–75°F / 21–24°C).
- It should double in size and show lots of bubbles within 4–8 hours.
💡 Pro Tip: Your levain is ready when it passes the float test—a small piece dropped in water should float. This indicates it’s strong enough to leaven your dough.
Step 2: Autolyse (Optional but Recommended)
Autolyse is the process of mixing flour and water before adding salt and levain. This allows the flour to hydrate and gluten to begin developing naturally, improving texture and flavor.
- In a large bowl, combine 500g bread flour and 350g water (70% hydration).
- Mix with your hands or a spoon just until combined—no dry spots remain.
- Cover with a damp towel and let rest for 30–60 minutes.
💡 Why Autolyse? It improves dough extensibility, reduces mixing time, and enhances flavor development by allowing enzymes to break down starches naturally.
Mixing and Bulk Fermentation
Step 3: Mix the Dough
After autolyse, it’s time to add the levain and salt, and begin developing gluten through stretch and folds.
- Add Levain and Salt:
- Add 100g of your active levain to the autolysed dough.
- Sprinkle 10g salt over the top.
- Using wet hands, gently incorporate the levain and salt into the dough. Pinch and fold to distribute evenly.
- Initial Bulk Fermentation:
- Cover the bowl (towel or lid) and let the dough rest for 30 minutes.
- After resting, perform stretch and folds every 30 minutes for the first 2 hours (4 sets total).
- Wet your hands, reach under one side of the dough, stretch it upward, and fold it over itself. Rotate the bowl and repeat around the dough. This builds structure and strength.
💡 Stretch and Fold Technique: These gentle folds develop gluten without overworking the dough, creating an open, airy crumb.
Step 4: Bulk Fermentation Continued
After the initial stretch-and-fold phase, let the dough continue fermenting at room temperature (ideally 72–75°F / 22–24°C) for a total of 4–6 hours, depending on temperature and starter strength.
- During this time, the dough should rise by 50–75% in volume.
- It will become bubbly, slightly jiggly, and smell pleasantly sour and yeasty.
- If your kitchen is cold (below 70°F / 21°C), fermentation may take longer. Consider using a slightly warmer spot (e.g., near the oven with the light on).
💡 How to Tell When Bulk Fermentation Is Done:
- Volume: Dough has risen significantly but not doubled.
- Bubbles: Surface and sides are covered in small to medium bubbles.
- Texture: Feels lively and slightly elastic when gently poked.
Shaping and Final Proof
Step 5: Pre-Shape
Once bulk fermentation is complete, it’s time to shape the dough for its final rise.
- Lightly flour a clean surface.
- Turn the dough out gently to avoid degassing it completely.
- Using a dough scraper, fold the edges of the dough toward the center to create surface tension.
- Flip the dough and shape into a loose round (boule) or oval (batard).
Step 6: Final Proof
Transfer the shaped dough to a well-floured banneton (proofing basket), seam-side up.
- If you don’t have a banneton, line a bowl with a floured kitchen towel.
- Cover with a damp towel or plastic wrap.
- Refrigerate for 12–16 hours (overnight) for cold proofing.
- Cold proofing enhances flavor, improves crust development, and makes scoring easier.
- Alternatively, proof at room temperature for 1–2 hours if in a hurry (but flavor will be milder).
💡 Why Cold Proof? It slows fermentation, allowing more time for flavor development and easier handling. The dough will be more relaxed and easier to score in the morning.
Assembly: Baking Your Pain au Levain
Step 7: Preheat the Oven and Dutch Oven
Preheat your oven to 475°F (245°C) for at least 45 minutes before baking. Place your Dutch oven (with lid) inside to heat thoroughly.
Important: A preheated Dutch oven traps steam, which is crucial for creating a crisp crust and open crumb.
Step 8: Score and Bake
Carefully remove the dough from the fridge. It should feel firm and hold its shape.
- Prepare the Dough:
- Line a baking sheet or peel with parchment paper.
- Turn the dough out onto the parchment.
- Use a lame or sharp razor to make a single, confident cut (or a cross, or curved slash) about ½ inch deep.
- Bake:
- Carefully transfer the parchment (with dough) into the preheated Dutch oven.
- Cover immediately with the lid.
- Bake at 475°F (245°C) for 20 minutes.
- Remove the lid and bake for another 20–25 minutes, until deep golden brown.
- The internal temperature should reach 205–210°F (96–99°C).
- Cool:
- Transfer the loaf to a wire rack.
- Let it cool completely (at least 2 hours) before slicing. This allows the crumb to set and prevents a gummy texture.
💡 Why Score the Dough? Scoring controls the expansion of the dough during baking, prevents cracks, and creates the signature “oven spring.” A single slash allows the loaf to expand upward, while decorative patterns are for aesthetics.
Common Mistakes to Avoid
- Overproofing: If the dough collapses or smells overly sour, it may have proofed too long. Keep an eye on volume and texture, not just time.
- Underproofing: Dough that doesn’t rise much or feels dense may need more fermentation time. Trust your senses, not the clock.
- Overmixing: Gluten develops naturally with stretch and folds. Overmixing can make the crumb tight and closed.
- Skipping autolyse: While not mandatory, autolyse improves dough handling and flavor. Don’t skip it unless necessary.
- Baking without steam: Dry heat = pale crust. Always bake in a preheated, lidded Dutch oven or use a steam pan.
- Slicing too soon: Cutting warm bread releases steam and can make the crumb gummy. Patience pays off!
Pro Tips for Success
- Consistent Starter: Maintain your levain regularly. A weak starter = weak rise. Feed it 1:1:1 (starter:flour:water) every 12–24 hours at room temperature.
- Dough Temperature: Aim for a dough temperature of 75–78°F (24–26°C) after mixing. If too cold, fermentation slows; if too warm, it speeds up uncontrollably. Adjust water temperature accordingly.
- Use a Scale: Baking by weight (grams) ensures consistency. Volume measurements (cups) vary by flour and packing.
- Experiment with Flours: Try mixing 80% bread flour with 20% whole wheat or rye for added complexity and nutrition.
- Keep a Baking Journal: Note fermentation times, temperatures, and results. Over time, you’ll learn what works best in your kitchen.
- Embrace Imperfection: Not every loaf will be perfect—and that’s okay! Even “failed” loaves are delicious. Focus on the process, not the outcome.
- Share Your Bread: Nothing beats the joy of breaking bread with others. Freshly baked pain au levain is best enjoyed the day it’s made, but it also toasts beautifully.
💡 Bonus Idea: Try baking a second loaf using the “sourdough discard” method—use 100g of unfed starter in place of levain for a tangier, slightly less structured loaf.
There’s something deeply satisfying about baking bread with your own hands—especially when it’s made with a natural levain, slow-fermented, and baked to golden perfection. Pain au levain naturel isn’t just food; it’s a connection to tradition, patience, and the quiet magic of fermentation.
While the process requires attention to detail, remember that every loaf is a learning experience. Don’t be discouraged by early attempts. With practice, your kitchen will fill with the irresistible aroma of freshly baked sourdough, and your table will always have a centerpiece worthy of sharing.
So preheat your Dutch oven, feed your starter, and get ready to bake. Your journey to artisan sourdough begins now.
