Are you dreaming of a brighter, more even complexion? Instead of turning to expensive salon treatments or chemical-laden products, why not try a simple, natural solution right in your own kitchen? A lemon brightening face mask is a time-tested remedy that can help lighten dark spots, fade acne scars, and give your skin a fresh, glowing appearance. Packed with vitamin C and natural acids, lemon works gently to exfoliate and brighten, leaving your skin looking refreshed and revitalized.
In this comprehensive guide, we’ll walk you through how to make and use a lemon brightening face mask safely and effectively. You’ll learn the best ingredients to pair with lemon for maximum benefits, how to avoid common pitfalls, and expert tips to enhance your results. Whether you're dealing with dull skin, sun damage, or just want to maintain a luminous glow, this easy DIY mask is your go-to solution.
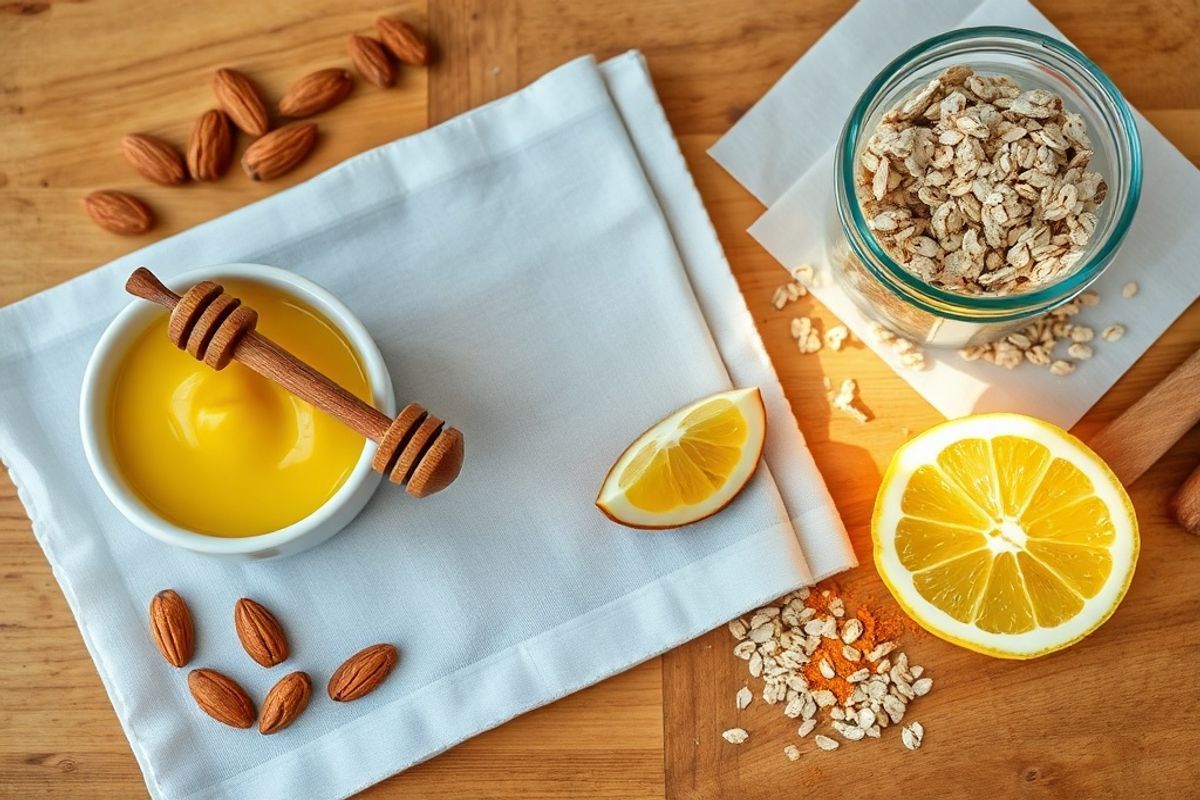
Materials Needed
- Fresh lemon – ½ lemon (organic preferred)
- Honey – 1 tablespoon (raw or Manuka honey for best results)
- Yogurt – 1 tablespoon (plain, unsweetened, preferably Greek yogurt)
- Turmeric (optional) – ½ teaspoon (for added anti-inflammatory benefits and glow)
- Cotton pads or gauze – for application or spot treatment
- Bowl and spoon – for mixing
- Measuring spoons – for accuracy
Before you begin, make sure you’re not allergic to any of these ingredients. Perform a patch test on your inner arm 24 hours before applying the mask to your face.
Preparation Steps
Step 1: Cleanse Your Skin
Start by washing your face thoroughly with a gentle cleanser to remove dirt, oil, and makeup. This ensures your skin is clean and ready to absorb the mask’s active ingredients. Pat your face dry with a clean towel—avoid rubbing, which can irritate the skin.
If you have sensitive skin, consider steaming your face for 2–3 minutes to open your pores and enhance absorption. Simply drape a warm, damp towel over your face for a few minutes.
Step 2: Prepare the Lemon Juice
Cut the lemon in half and squeeze out the juice. Strain it through a fine mesh sieve or cheesecloth to remove any pulp or seeds. You should have about 1 tablespoon of fresh lemon juice. Avoid bottled lemon juice, as it often contains preservatives and lacks the natural enzymes found in fresh lemon.
Place the lemon juice in a clean mixing bowl. If you’re using turmeric, add the ½ teaspoon to the bowl now.
Assembly
Step 3: Mix the Ingredients
Add the honey and yogurt to the bowl with the lemon juice. Honey is a natural humectant that locks in moisture, while yogurt contains lactic acid, which gently exfoliates and brightens. The combination creates a soothing, nourishing base that balances the citric acid in lemon.
Using a spoon, mix the ingredients until you have a smooth, even paste. The consistency should be thick enough to stay on your face without dripping but thin enough to spread easily. If the mixture is too runny, add a little more yogurt. If it’s too thick, add a few drops of water or aloe vera gel.
Step 4: Apply the Mask to Your Face
Using clean fingers or a facial brush, apply the mask evenly to your face, avoiding the eye area and lips. Focus on areas prone to dark spots or dullness, such as the forehead, cheeks, and around the nose. For spot treatment on acne scars or dark patches, use a cotton pad to dab the mixture directly onto the affected area.
Once applied, lie down and relax for 10–15 minutes. Avoid talking or moving your facial muscles to prevent the mask from cracking. Keep the mask on for no longer than 15 minutes—lemon juice can be drying and may cause sensitivity if left on too long.
Mistakes to Avoid
While lemon is a powerhouse ingredient, it can also cause irritation if not used correctly. Here are some common mistakes to steer clear of:
- Applying undiluted lemon juice directly to the skin – Always mix it with other ingredients to dilute its acidity and reduce the risk of irritation or burns.
- Leaving the mask on too long – More than 15 minutes increases the risk of redness, dryness, or even chemical burns, especially on sensitive skin.
- Using lemon on broken or irritated skin – Avoid applying the mask if you have cuts, sunburn, or active acne with open wounds.
- Skipping the patch test – Even if you’ve used lemon before, your skin’s tolerance can change over time. Always test a small area first.
- Exposing your skin to the sun after application – Lemon juice makes your skin photosensitive. Avoid going outside without sunscreen for at least 12 hours after using the mask to prevent sun damage.
Pro Tips
Want to take your lemon brightening mask to the next level? Try these expert tips for even better results:
- Use at night – Applying the mask before bed allows your skin to repair itself overnight without exposure to environmental stressors like pollution and UV rays.
- Combine with aloe vera – Adding 1 teaspoon of aloe vera gel to the mixture soothes the skin and reduces the risk of irritation from the lemon.
- Try a weekly routine – Use the mask once a week for best results. Overuse can lead to dryness or sensitivity.
- Store leftovers properly – The mask is best used fresh, but if you have leftovers, store them in an airtight container in the refrigerator for up to 24 hours. Bring to room temperature before reapplying.
- Follow with a hydrating serum – After rinsing off the mask, apply a lightweight moisturizer or hydrating serum to replenish lost moisture and lock in the benefits.
- Use cold water to rinse – Rinse your face with cool water to help close the pores and soothe the skin after the treatment.
Remember, consistency is key. Like any skincare treatment, the brightening effects of the lemon mask build up over time. You may start to see subtle improvements after just one use, but for long-term results, aim for regular application over several weeks.
Also, consider pairing this mask with a healthy diet rich in vitamin C, such as citrus fruits, bell peppers, and leafy greens. Hydration is equally important—drink plenty of water to support skin healing and radiance from within.
Finally, always listen to your skin. If you experience persistent redness, itching, or discomfort, discontinue use immediately and consult a dermatologist. Everyone’s skin is unique, and what works for one person may not suit another.
With this easy-to-follow guide, you now have everything you need to create your own lemon brightening face mask at home. Say goodbye to dull, tired-looking skin and hello to a fresher, more radiant complexion—naturally and affordably.
Ready to glow? Gather your ingredients, set aside a few minutes, and treat your skin to this rejuvenating ritual. Your complexion will thank you!
