Your chrome faucet is the shining star of your kitchen or bathroom, gleaming under the light and reflecting your attention to detail. But over time, even the most well-maintained chrome fixtures can fall victim to mineral buildup from hard water. White, crusty deposits and a dull finish can make your once-sparkling faucet look old and neglected.
Don’t let mineral deposits win! Descaling your chrome faucet is easier than you think and doesn’t require harsh chemicals. With just a few household staples and a bit of patience, you can restore your faucet’s shine and improve its function. Whether you're dealing with a single-handle kitchen faucet or a vintage bathroom spout, this guide will walk you through a safe, effective, and eco-friendly descaling process.
Let’s get started and bring back the brilliance of your chrome faucet.
Materials Needed
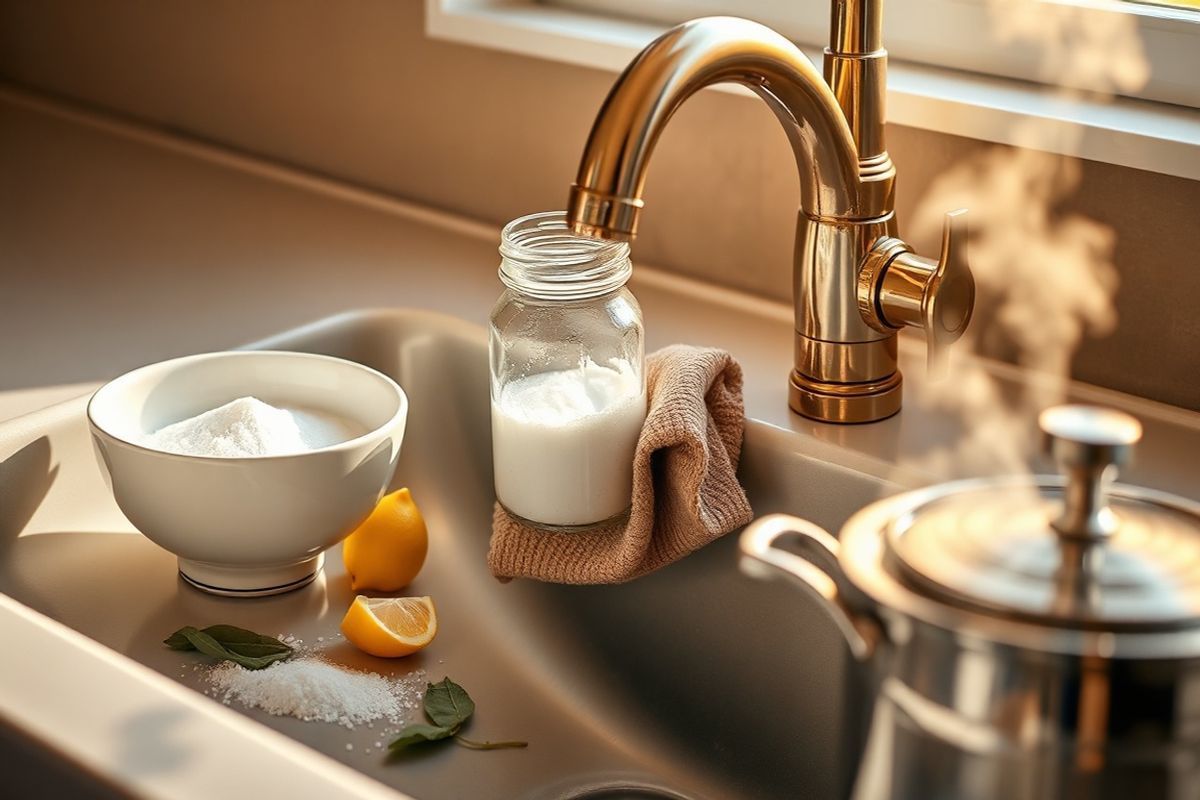
- White vinegar (most effective natural descaler)
- Soft cloths or microfiber towels (to avoid scratching)
- Old toothbrush or soft-bristled brush (for tight spots)
- Plastic bag or rubber band (to secure the vinegar-soaked cloth)
- Lemon juice (optional, for extra cleaning power and fresh scent)
- Baking soda (optional, gentle abrasive for tough stains)
- Plumber’s tape (Teflon tape) (if disassembling parts of the faucet)
- Wrench or adjustable pliers (only if removing aerator or parts)
Preparation Steps
Step 1: Turn Off the Water Supply
Before you begin, ensure the water supply is turned off. Locate the shut-off valves under the sink and turn them clockwise to close. If there are no valves, turn off the main water supply to your home.
Open the faucet to release any remaining water in the lines and relieve pressure.
Step 2: Clean the Surface
Wipe down the faucet and surrounding area with a damp cloth to remove dust, soap scum, and any loose debris. This ensures that when you apply the vinegar solution, it contacts the surface directly without interference.
Pay special attention to the aerator (if applicable) and the base of the faucet, where buildup often accumulates.
Assembly
Step 3: Soak the Faucet with Vinegar
There are two effective ways to apply vinegar depending on your faucet type:
Method A: Direct Vinegar Soak (Best for Small Areas)
For faucets with minimal buildup, soak a soft cloth or paper towel in white vinegar. Wrap the cloth around the faucet, especially focusing on the aerator, handles, and spout. Secure it with a rubber band or plastic bag to keep it in place for 30–60 minutes.
Method B: Vinegar Soak for Removable Parts
If your faucet has a removable aerator, unscrew it using a wrench or pliers (wrap a cloth around the aerator to prevent scratching). Place the aerator in a bowl of white vinegar and let it soak for 30 minutes. While it’s soaking, you can also soak the faucet head in a bag filled with vinegar.
💡 Pro Tip: For stubborn buildup, heat the vinegar slightly (not boiling) before soaking. Warm vinegar helps dissolve mineral deposits faster.
Step 4: Scrub and Rinse
After the soaking time, remove the vinegar-soaked cloth and gently scrub the faucet with the soft-bristled brush or toothbrush. Focus on crevices, seams, and the aerator screen where limescale tends to hide.
For tough stains, make a paste with baking soda and a little water. Apply it to the affected areas, let it sit for 5–10 minutes, then scrub gently with the brush. Baking soda is mildly abrasive and safe for chrome surfaces.
Rinse the entire faucet thoroughly with warm water to remove all traces of vinegar and residue. Dry it immediately with a clean, soft cloth to prevent water spots and restore shine.
Mistakes to Avoid
❌ Using steel wool or harsh pads: These can scratch the chrome finish, leaving permanent marks.
❌ Leaving vinegar on too long: While vinegar is safe, prolonged exposure can tarnish chrome over time. Stick to 30–60 minutes max.
❌ Ignoring the aerator: Mineral buildup in the aerator restricts water flow. Always clean or replace it if clogged.
❌ Using bleach or commercial descalers: These can corrode chrome and damage seals. Stick to natural solutions like vinegar or citric acid.
Pro Tips
- Prevent Future Buildup: Wipe down your faucet weekly with a damp cloth and dry it. Consider installing a water softener if you have hard water.
- Use Lemon Juice for Shine: After rinsing, rub a lemon wedge over the faucet. The mild acid adds shine and leaves a fresh scent.
- Regular Maintenance: Descale your faucet every 1–2 months in hard water areas to prevent heavy buildup.
- Check for Leaks: While cleaning, inspect the faucet for drips or worn washers. Addressing leaks early prevents further damage.
- Use Distilled Water for Final Rinse: If possible, use distilled water for the final rinse to prevent new mineral deposits from forming.
With these steps and tips, your chrome faucet will look and perform like new. Regular descaling not only enhances aesthetics but also extends the life of your fixture. Plus, using natural cleaners keeps your home healthier and more sustainable.
Enjoy the renewed sparkle of your chrome faucet—it’s a small task with big visual rewards!
